Presage/User Guide/Configuration Screen
Configuration Screen
The Configuration Screen is used to configure a variety of different functions within Presage.
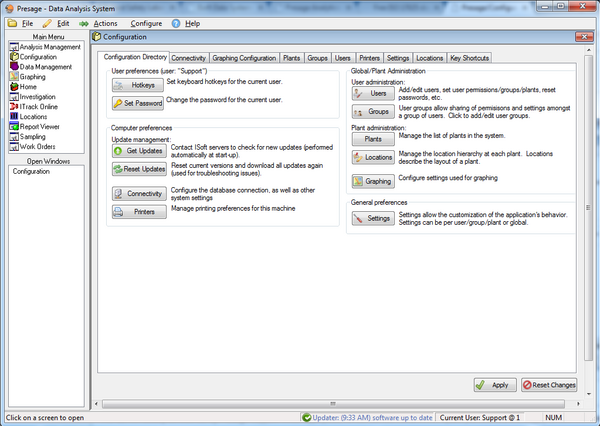
Configuration Directory Tab
This screen is used as a reference. The buttons here are shortcuts to the rest of the tabs in the Configuration Screen.
Connectivity Tab
This tab will usually be filled out by Presage Support. When appropriate, fill out the information in the space provided and click Apply to save the changes.
Plants Tab
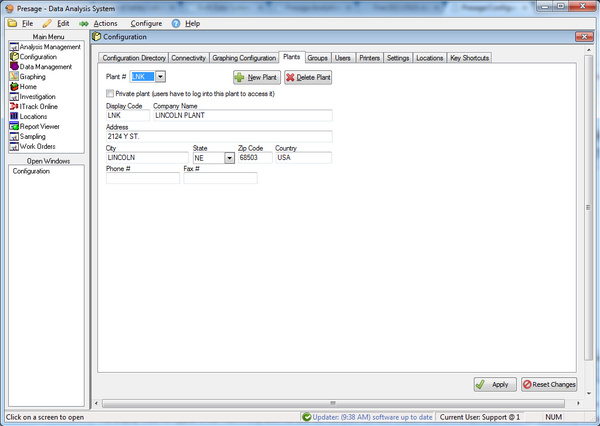
Use Plants tab to add and delete plants.
To add a plant, click New Plant. For Plant #, select New from the drop-down list. If the new plant is private, check the box provided. With this option, users must log in to have access to the new plant.
The Display Code will appear in the Plant # drop-down list after the new plant has been created. Choose a unique code which will best identify the plant.
Company Name refers to the business name a particular plant is associated with. Fill in all information in the spaces provided.
To delete a plant, choose the plant from the Plant # drop-down list then click Delete Plant.
Groups Tab
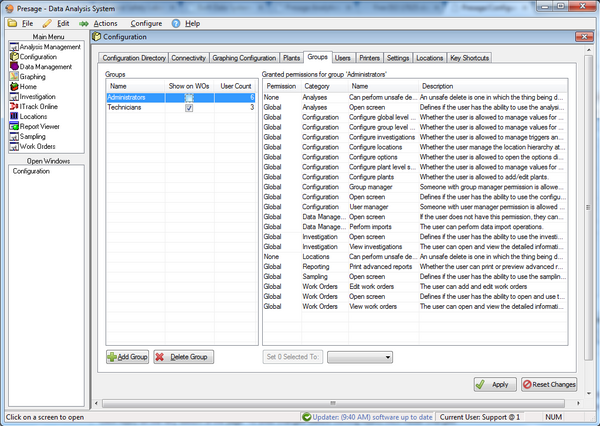
Use Groups tab to add, delete, and set permissions to groups.
To add a group, click Add Group. Type in group name in the pop-up box, then click OK. The new group will show up under Groups list.
To delete a group, select the group name, then click Delete Group.
To set permissions to a group, select the group name, then select the permission setting from the drop-down list under Grant next to each category. If one permission level is appropriate for multiple categories, then select those categories while holding down the Ctrl key and select permission setting from the drop-down list next to Set # Selected To: on the lower portion of the screen. Click updated Set # Selected To:.
Click Apply on the very bottom of the page. To undo changes (before clicking Apply) click Reset Changes.
Users Tab
Click the link below to watch VIDEO TUTORIAL for User's Configuration.
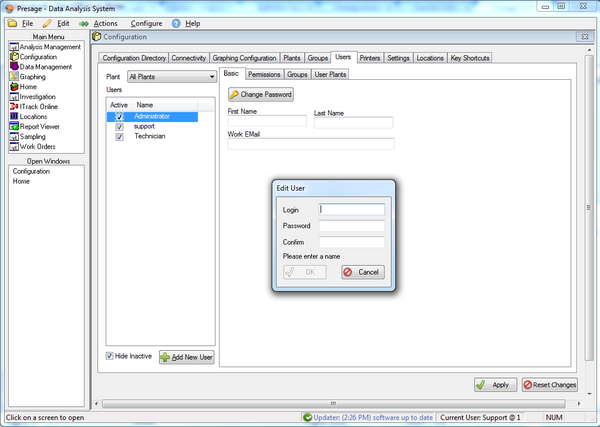
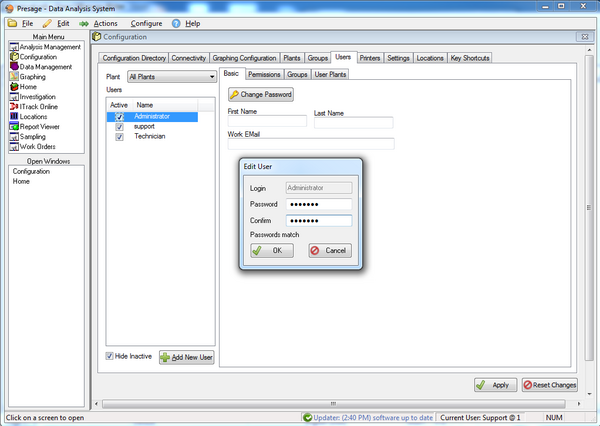
To add a new user, click Add User. Enter login name and password, and re-enter password to confirm in the pop-up box. Click OK.
To inactivate users, simply uncheck the box next to the users' names. Check Hide Inactive box to take inactive users out of the users list. This option does not delete users’ names from the list, only hides them.
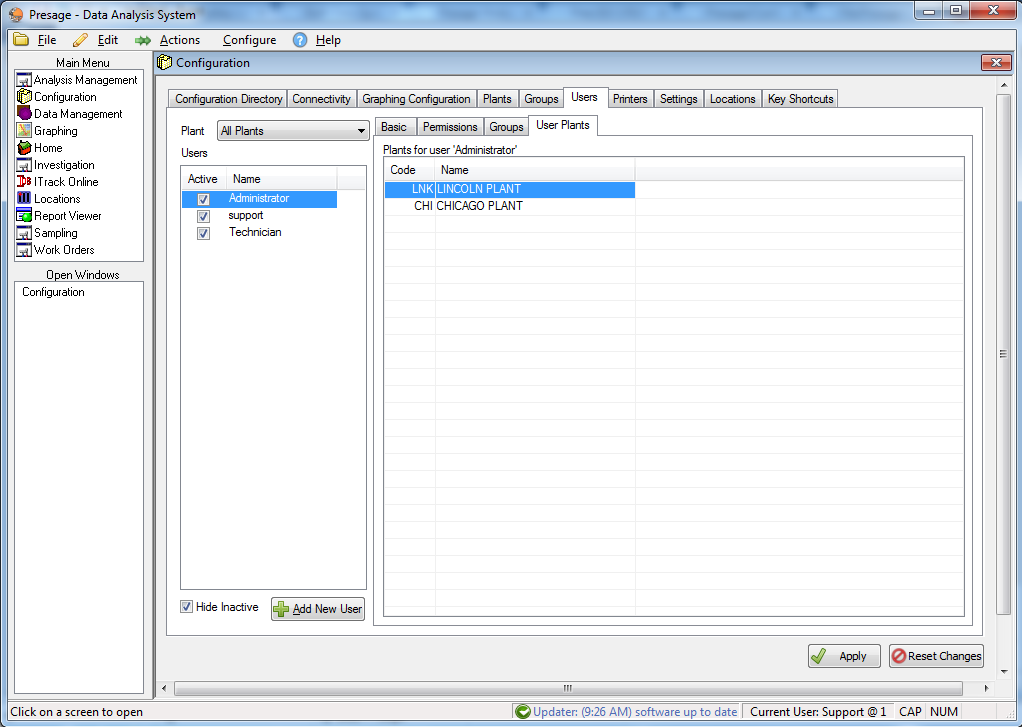
Users tab has four sub-tabs: Basic, Permissions, Groups, and User Plants.
Basic Sub-Tab
To change login password, go to the Basic tab and click Change Password. Enter password. Reenter password in the next box to confirm. Click OK.
Permissions Sub-Tab
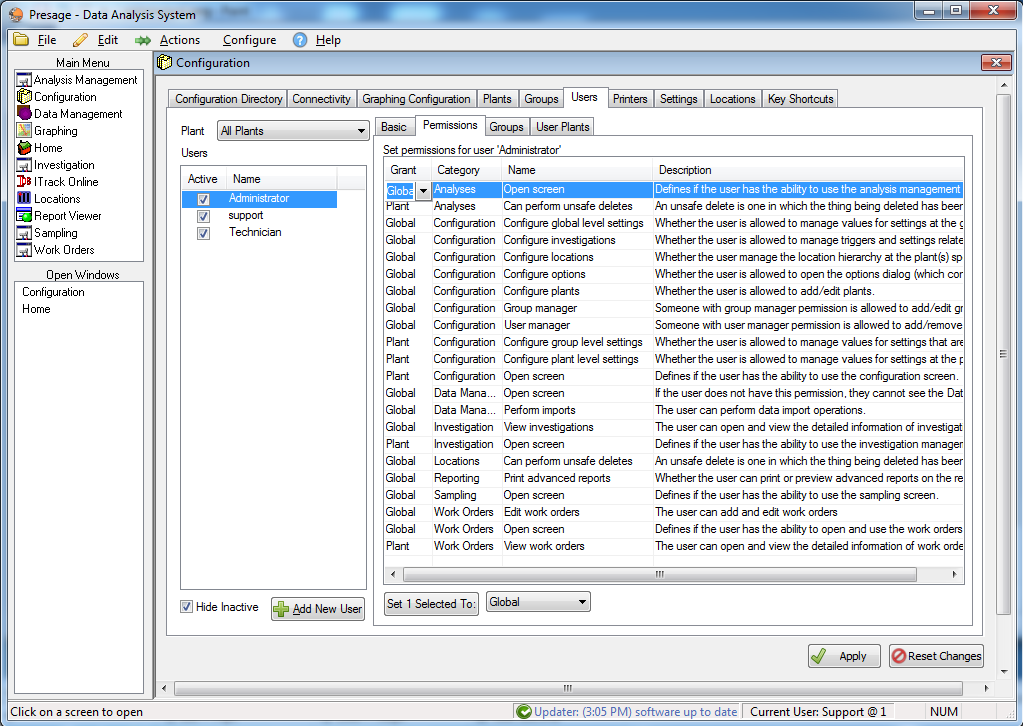
To set or change permissions for a user, click on Permissions sub-tab.
Click on the user's name to highlight it.
To change permission settings individually for each category, click on each row in the Grant column, a drop-down list of permission settings will occur. Make the desired selection.
Click Reset Changes to undo changes. Click Apply to save changes.
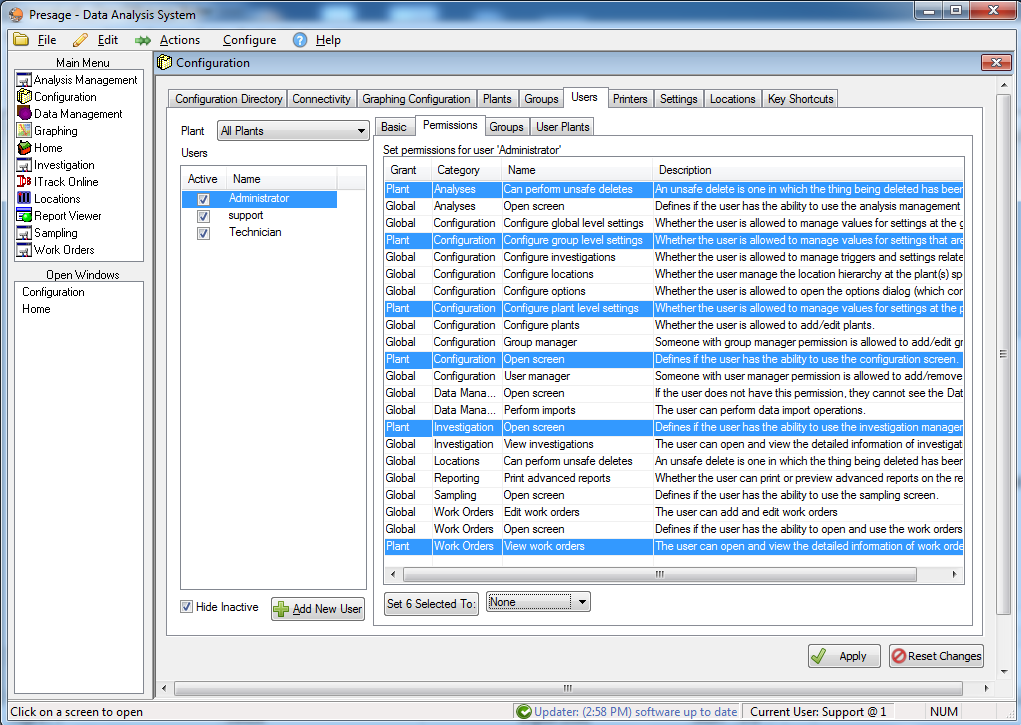
To change permissions for multiple categories at once, hold down the Ctrl key and select desired rows.
The first button directly below the permissions list will update the number of rows selected. Click on the second button, a drop-down list with permission settings will appear. Make the desired selection, then click the updated Set # Selected To: button to left of it.
Click Reset Changes to undo changes. Click Apply to save changes.
Groups Sub-Tab
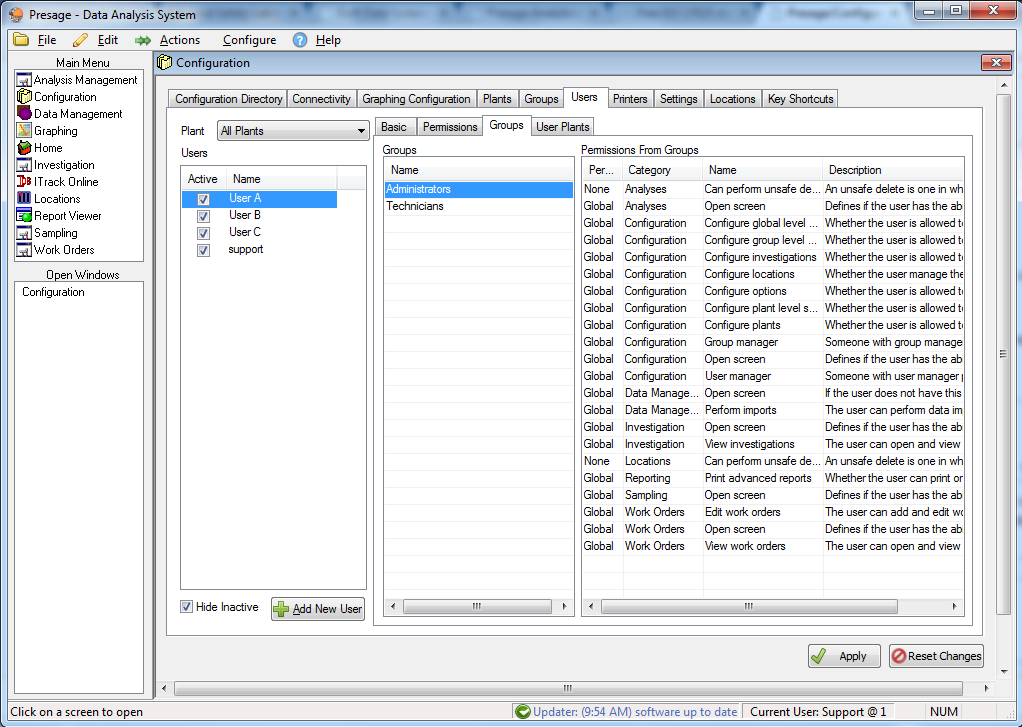
To assign users to groups, simply click on the user name, then select the group name(s). Click Apply.
User Plants Sub-Tab
To assign users to plants, simply click on the user name, then select the plant name(s). Click Apply.
Printers Tab
Report Type drop-down list includes reports with various dimensions used by the plant. Select one.
Printer Name is the printer name (identification code) used to print the report. Select the appropriate printer used for the report dimensions selected.
The Driver and Port information will be filled automatically.
Click Apply. To undo any changes made before clicking Apply, use the Reset Changes button.
If there are multiple report types, follow the steps above to set appropriate Printer Name to other reports. Click Apply after each setting.
Settings Tab
This screen will be used initially to customize the software to the needs of the company. If need be, simply make changes by typing them into the Value column.
Locations Tab
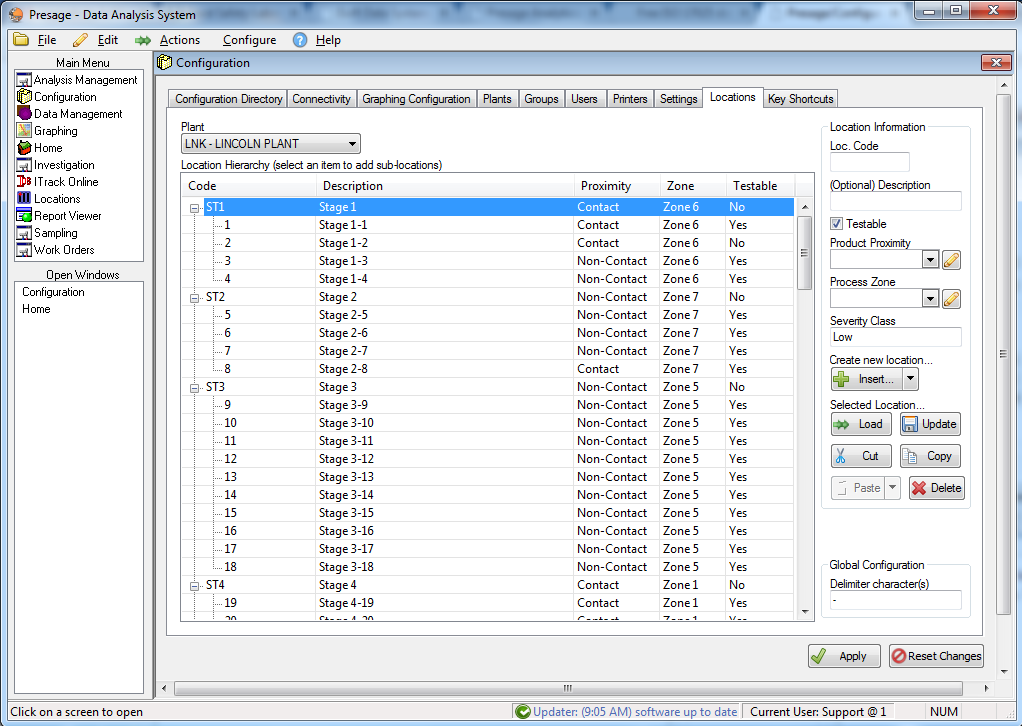
To add locations or make changes to the location hierarchy, first select the appropriate plant from the Plant drop-down list.
Highlight an existing location from the Location Hierarchy, fill out the Location Information for the new location. Fill out the Loc. Code and Description, check the box if the new sight is testable, and select the appropriate product proximity and process zone from the drop-down lists. The Severity Class is filled automatically based on the process zone selected. Click on the arrow next to Insert and specify where in the hierarchy the new location belongs: parent or child of the location highlighted.
Note: Severity classes are assigned to product proximity and process zone combinations in the Analysis Management: Severity Classes screen.
Use Load button to bring up the Location Information of the location selected from the Location Hierarchy.
Use Cut, Copy, and Paste buttons to adjust the Location Hierarchy. Select a location, click Cut. Click on the arrow next to the Paste button, specify if the cut location needs to be pasted below or above the location selected in the Location Hierarchy.
To delete a location, select a location from the Location Hierarchy then click Delete.
Click on Update to see the changes under the Location Hierarchy. This option does not save the changes made.
Click Apply to save changes. To undo a change (before clicking Apply) use the Reset Changes button.
The pencil buttons next to the Product Proximity and Process Zone are shortcuts to the Severity Classes tab under the Analysis Management window. Changes to the product proximity, process zones, and severity class combinations can be made in this screen.
Key Shortcuts Tab
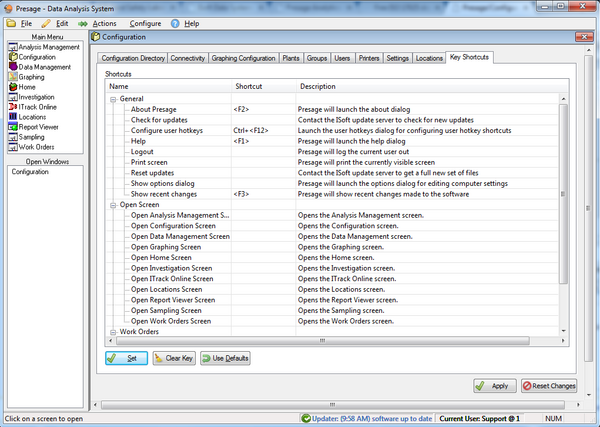
This page is for reference and to create, change, and delete shortcuts. For example, setting F5 key as a shortcut for opening the Analysis Management screen enables the user to press the F5 key (while the Presage Software is open) to open the screen instead of using the mouse to click on the Analysis Management under the Main Menu. Any key can be used as a shortcut.
To set a shortcut, select one of the options under the column Name and click Set. A new pop-up window comes up. Press the key to be used as a shortcut, then click OK.
To delete a shortcut, select the one of the options under the column Name and click Clear Key.
To use default shortcuts, select one of the options under Name and click Use Defaults.
For any changes made, click Apply to save. To undo changes (before clicking Apply), use the Reset Changes button.
Work Order Types Tab
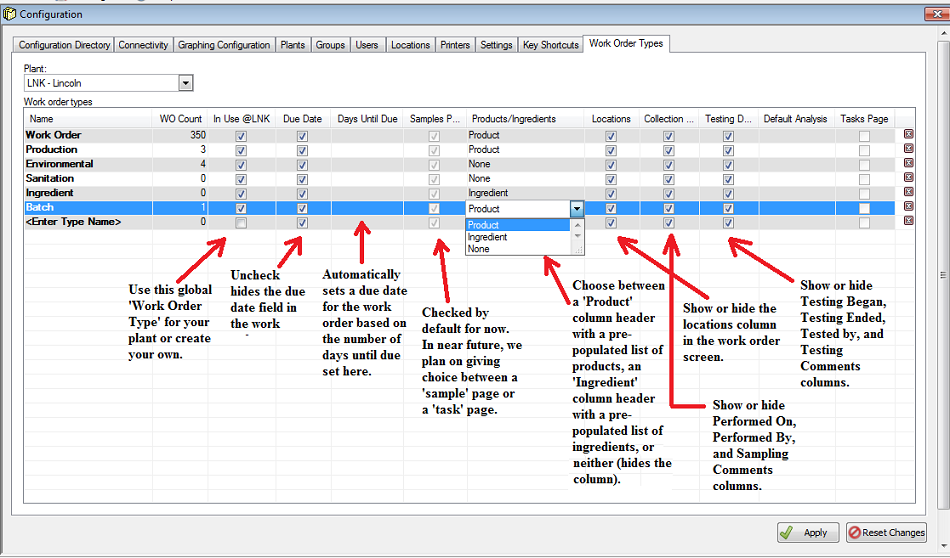
Work order types can be created, edited, and assigned to a plant in this screen.
First pick a plant from the Plant: drop-down if your user is assigned to multiple plants.
To create a new work order type, click on the field with <Enter Type Name>. Type in what you would like to name the work order type.
The WO Count column is informational and nothing needs to be done to it.
Check the box under In Use @(Plant Code) to make this work order type visible to that plant.
Check the box under Due Date if this work order type will require a due date. Days Until Due is where you can specify a number for the number of days the due date will be after the date the work order is created. When a number is specified here, the Due Date is automatically filled in the Work Order screen for this type of work order.
Check "Samples Page if this work order type will be for data collection (versus a task management).
Choose to show the Product column OR Ingredient column OR neither. Selecting the Product will make that column appear in the Work Order screen with a pre-filled drop-down list of all products. Selecting Ingredient will do the same but with a list of all ingredients. Selecting None will hide the column.
Check Locations if you need to specify a location for the data collection.
Check Collection Data if you would like to see Performed On, Performed By, and Sampling Comments columns in the Work Order screen.
Check Testing Data if you would like to see Testing Began, Testing Ended, Tested By, and Testing Comments columns in the Work Order screen.
Select an analysis from the Default Analysis drop-down list to auto-select this analysis when creating new samples in the Work Order screen.
Check Tasks Page if this work order type will be for task management (versus sample data collection).
To activate an existing global work order type to a certain plant, simply select the work order type then check the box under In Use @(Plant Code).
