Difference between revisions of "Presage/User Guide/Document Management Screen/converting-doc-to-html"
From ISoft Wiki
Jump to navigationJump to search
| (30 intermediate revisions by the same user not shown) | |||
| Line 1: | Line 1: | ||
Let's say you have a document | Let's say you have a file you want to upload in the Microsoft word format. To convert the document to an HTML file, follow these steps. | ||
== | ==Exporting a word document to an HTML file== | ||
[[Image:WordFileWithPopcorn.PNG|none|600px]] | |||
In addition, from Microsoft word, you can export the word file as an HTML file. | |||
[[Image: | [[Image:WordToHTML2.PNG|none|600px]] | ||
To do this, click the '''file''' button in the top left corner. From there you can click '''Export > Change File Type > Save As'''. | |||
[[Image:WordToHTML3.png|none|600px]] | |||
Finally, after you click '''Save As''', click '''Save as File Type''' and selecting the .html file tag. | |||
'''NOTE:''' at the moment exporting through word does not preserve the image as part of the HTML file, so the image will not show up in Presage. If you would | |||
like the images to be embedded in your file so they show up in Presage mobile, feel free to email customer support and we will do this for you. | |||
If you would like to encode and embed the images yourself, follow the tutorial below: | |||
==Encoding and Embedding the images into HTML== | |||
Encoding images to base64 can be a little tricky, so click '''[[Presage/User_Guide/Document_Management_Screen/converting-doc-to-html/base64-stuff|HERE]]''' to see how. | |||
Latest revision as of 08:07, 24 June 2020
Let's say you have a file you want to upload in the Microsoft word format. To convert the document to an HTML file, follow these steps.
Exporting a word document to an HTML file
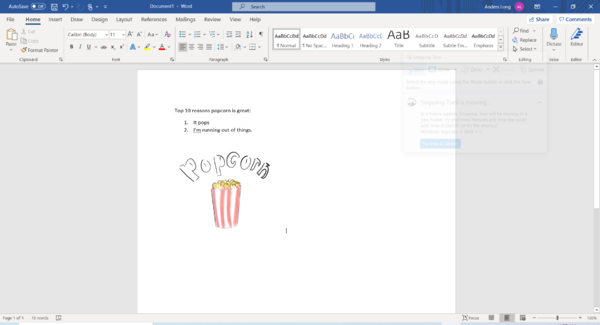
In addition, from Microsoft word, you can export the word file as an HTML file.
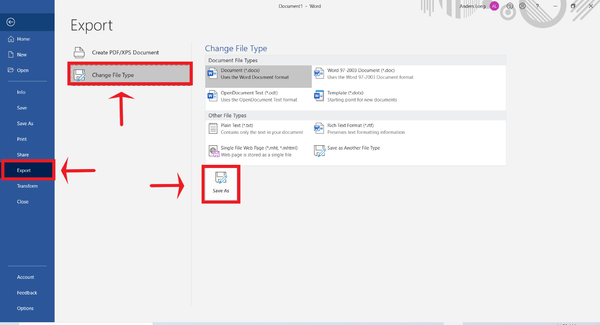
To do this, click the file button in the top left corner. From there you can click Export > Change File Type > Save As.
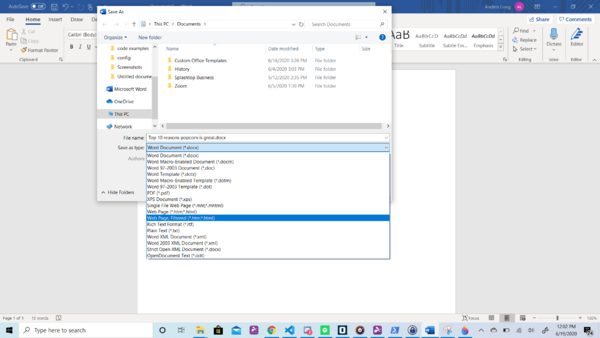
Finally, after you click Save As, click Save as File Type and selecting the .html file tag.
 NOTE: at the moment exporting through word does not preserve the image as part of the HTML file, so the image will not show up in Presage. If you would

 like the images to be embedded in your file so they show up in Presage mobile, feel free to email customer support and we will do this for you.
If you would like to encode and embed the images yourself, follow the tutorial below:
Encoding and Embedding the images into HTML
Encoding images to base64 can be a little tricky, so click HERE to see how.


