Difference between revisions of "Presage/User Guide/ITrackLX Mobile App"
(Created page with "==How to insert the iPod in the Linea Pro scanner.== thumb|center|600px ==Install the ITrack Mobile App on the iPod.== Click on th...") |
|||
| (7 intermediate revisions by 3 users not shown) | |||
| Line 40: | Line 40: | ||
Enter the Server URL provided by the Presage representative. | Enter the Server URL provided by the Presage representative. | ||
Presage URLs: | |||
https://COMPANY.presageanalytics.com/scanner | |||
Most presage deployments still have the old subdomain url's as well: | |||
COMPANY-scan.presageanalytics.com | |||
New deployments won't have them, and the existing ones will start getting redirected to the subdirectory url's as we update them | |||
| Line 46: | Line 52: | ||
Login with Presage username and password and click '''Log in!'''. | Login with Presage username and password and click '''Log in!'''. | ||
==Perform Sample== | ==Perform Sample== | ||
| Line 127: | Line 132: | ||
[[File:Investigationmobile.jpg|center]] | [[File:Investigationmobile.jpg|center]] | ||
==Work | |||
For steps on how to turn on this setting, click [[How to turn on the auto-investigation creation feature.]] | |||
==Work Orders== | |||
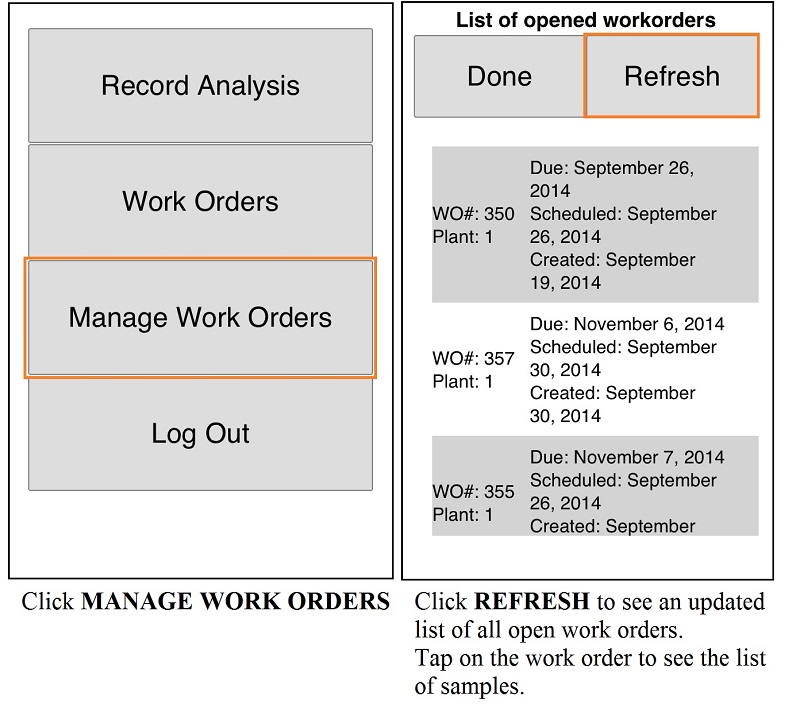
This option opens a list of all open work orders. | |||
[[File:PresageScannerOpenworkorders.jpg|center]] | |||
Open and edit a work order. | Open and edit a work order. | ||
| Line 137: | Line 149: | ||
To create a new work order, click '''Menu''' >> '''New Work Order'''. | To create a new work order, click '''Menu''' >> '''New Work Order'''. | ||
Click on the link below to watch a VIDEO TUTORIALS for the Work Order screen. | |||
Click on the link below to watch a VIDEO | |||
[http://www.youtube.com/watch?v=kCcdj8-yK9k/ Create a New Work Order] | [http://www.youtube.com/watch?v=kCcdj8-yK9k/ Create a New Work Order] | ||
[http://www.youtube.com/watch?v=-XOWb98dFRM/ Find an Existing Work Order] | [http://www.youtube.com/watch?v=-XOWb98dFRM/ Find an Existing Work Order] | ||
Latest revision as of 07:54, 9 April 2025
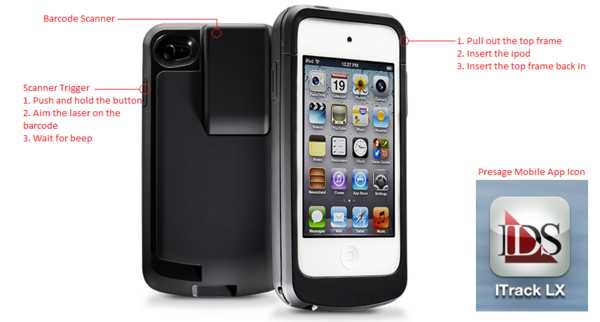
How to insert the iPod in the Linea Pro scanner.
Install the ITrack Mobile App on the iPod.
Click on the App Store icon on the iPod.
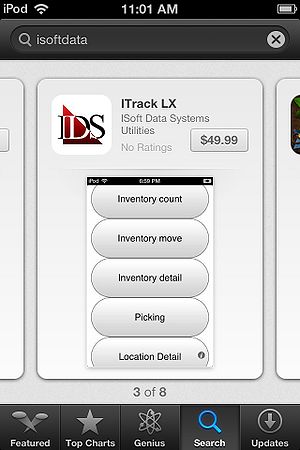
Type in isoftdata, and swipe from right to left until the following app shows up:
*The button may look different.
Click on the cloud button to install the app.
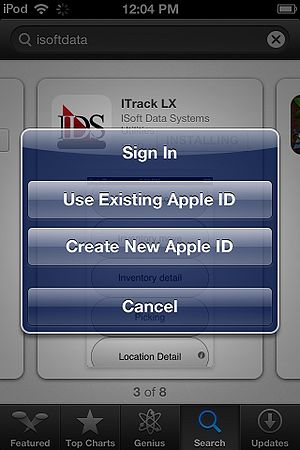
The following icon pops-up. Click Use Existing Apple ID.
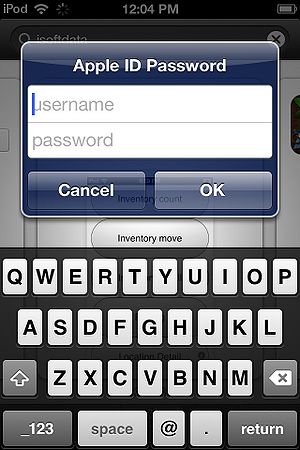
Enter the Apple ID and password. (A Presage representative will provide you with this information. It will be used across all plants in your companies, unless requested otherwise.)
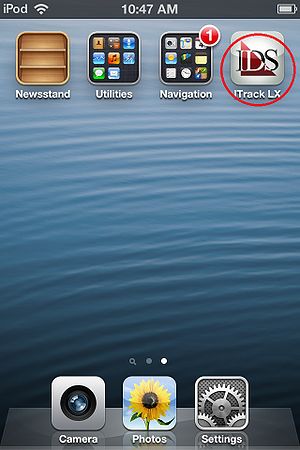
In the Home Screen, find the ITrackLX Mobile app icon and click on it.
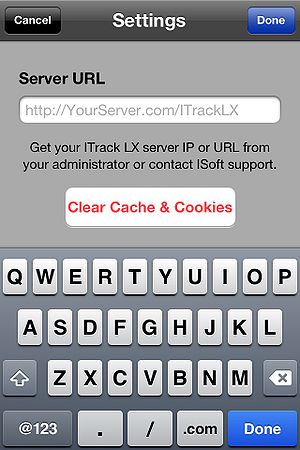
Enter the Server URL provided by the Presage representative.
Presage URLs:
https://COMPANY.presageanalytics.com/scanner
Most presage deployments still have the old subdomain url's as well: COMPANY-scan.presageanalytics.com New deployments won't have them, and the existing ones will start getting redirected to the subdirectory url's as we update them
Login with Presage username and password and click Log in!.
Perform Sample
To time-stamp when a sample was taken, click on the first button Perform Sample.
Press the button on the right side of the Linea Pro.
Place the red ray on the barcode. Hold until a sound comes out validating that the barcode was read.
A notification will appear confirming that the sample was marked.
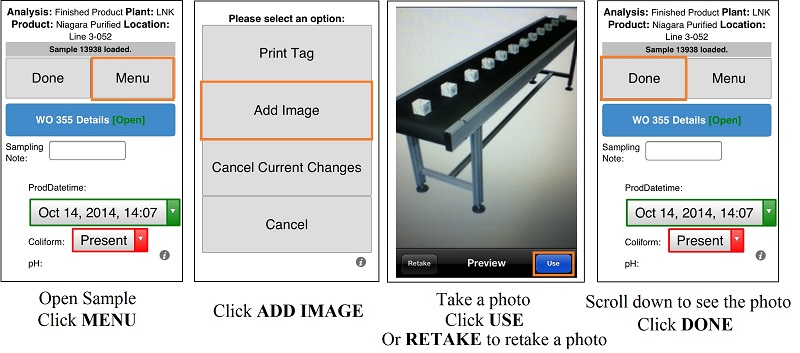
Click Add Image to attach an image to the sample.
Click Done to go back to the main menu.
The above steps will automatically update the work order in Presage.
1) The Status will change from Open to Sampled. 2) Performed On will be filled with the scan date and time. 3) Performed By will be filled with the user who logged in to the mobile app.
Incubate Sample
To time-stamp when a test is going in and out of the incubator, click on the second button Incubate Sample.
Press the button on the right side of the Linea Pro.
Place the red ray on the barcode. Hold until a sound comes out validating that the barcode was read.
A notification will appear confirming that the sample was marked.
Click Add Image to attach an image to the sample.
Click Done to go back to the main menu.
The above steps will automatically update the work order in Presage.
1) Testing Began will be filled with the date and time the barcode was scanned the first time.
2) Testing Ended will be filled with the date and time the barcode was scanned the second time.
3) Tested By will be filled with the user who logged in to the mobile app.
Record Analysis
To enter the result for a sample, click on the third button Record Analysis.
Press the button on the right side of the Linea Pro.
Place the red ray on the barcode. Hold until it beeps and sample appears on the screen.
All the options for the sample will show up. Select or type in the results.
Click Done to save and go back to the main menu. Click Cancel to delete changes and go back to the main menu.
The above steps will automatically update the work order in Presage.
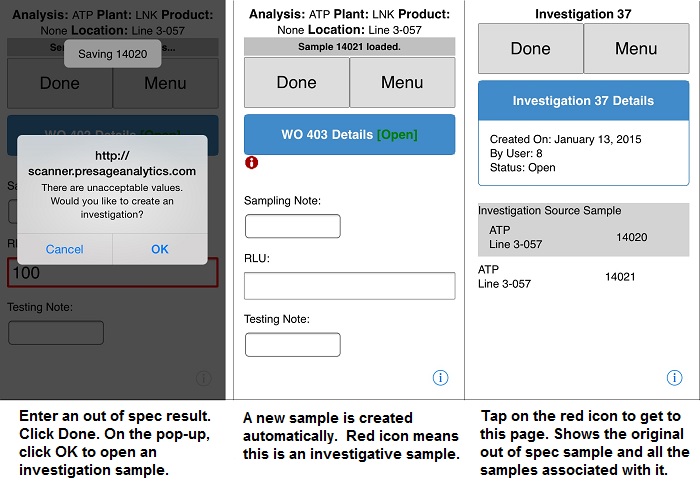
There is a setting in the software which turn on automatic investigation creation. When an out of spec result is entered, the mobile app will prompt for an initiation of an investigation sample.
For steps on how to turn on this setting, click How to turn on the auto-investigation creation feature.
Work Orders
This option opens a list of all open work orders.
Open and edit a work order.
Click Work Order in the Main Menu. If you have a work order barcode, go ahead and scan that now to open the work order. If not, click Menu >> Manual input: Work Order.
To create a new work order, click Menu >> New Work Order.
Click on the link below to watch a VIDEO TUTORIALS for the Work Order screen.
Settings
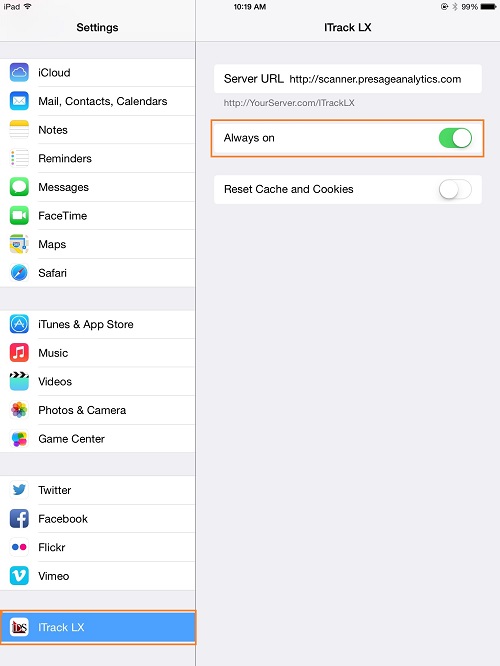
For the laser to be on at all times (instead of having to click on the button to bring up the laser), on the mobile setting, tap on ITrack LX then turn on the Always On.
