Difference between revisions of "Presage/User Guide/Locations Screen"
| Line 4: | Line 4: | ||
Click on the link below to watch a VIDEO TUTORIAL for the Locations screen. | Click on the link below to watch a VIDEO TUTORIAL for the Locations screen. | ||
[ | [https://www.youtube.com/watch?v=_N_J9TOdK8w/ Add and Edit New Location] | ||
Latest revision as of 08:11, 24 August 2022
Locations Screen
Click on the link below to watch a VIDEO TUTORIAL for the Locations screen.
PLANT MAP
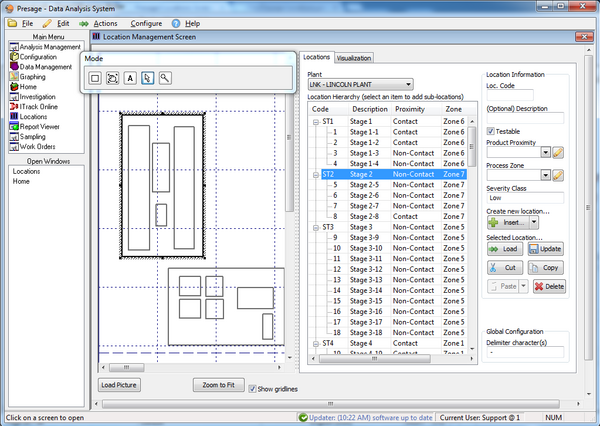
First, select the plant from the Plant drop-down list in the upper right-hand portion of the screen.
To upload a blueprint of the plant, click on Load Picture, locate and select the file, then click Open.
Click Zoom to Fit to make the entire map visible.
Uncheck the Show gridlines box to get rid of the background gridlines.
To map a location, select a location from the Location Hierarchy, then click on the button with a box on the Mode pop-up window. Click and drag cursor to place the box where appropriate. Now, the box and the location identification name are connected, and once the location identification name or code is selected, the coinciding box on the map will be highlighted automatically.
To add text, click on the box with the letter A then click and drag on the canvas to see the cursor appear.
Use the magnifying glass button on the Mode pop-up window to zoom in the picture or diagram.
Use the arrow button to rearrange and re-size boxes. Use the hand button to drag the canvas.
Tip: When several small squares are laid out very close to each other, it is easier to select one particular box by clicking on any box within the group and pressing Tab on keyboard to select other boxes within that area.
LOCATION INFORMATION
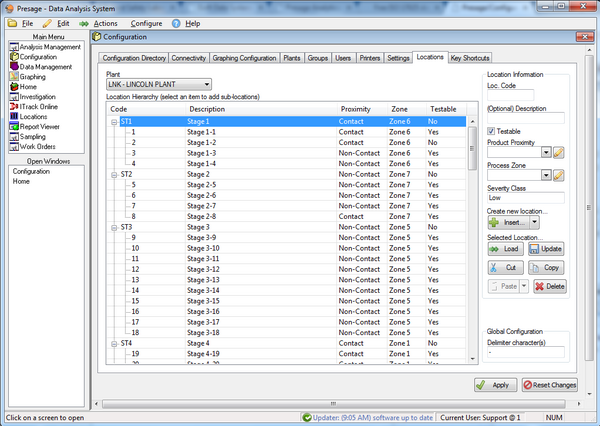
To add locations or make changes to the location hierarchy, first select the appropriate plant from the Plant drop-down list.
Highlight an existing location from the Location Hierarchy, fill out the Location Information for the new location. Fill out the Loc. Code and Description, check the box if the new sight is testable, and select the appropriate product proximity and process zone from the drop-down lists. The Severity Class is filled automatically based on the process zone selected. Click on the arrow next to Insert and specify where in the hierarchy the new location belongs: parent or child of the location highlighted.
Note: Severity classes are assigned to product proximity and process zone combinations in the Analysis Management: Severity Classes screen.
Use Load button to bring up the Location Information of the location selected from the Location Hierarchy.
Use Cut, Copy, and Paste buttons to adjust the Location Hierarchy. Select a location, click Cut. Click on the arrow next to the Paste button, specify if the cut location needs to be pasted below or above the location selected in the Location Hierarchy.
To delete a location, select a location from the Location Hierarchy then click Delete.
Click on Update to see the changes under the Location Hierarchy. This option does not save the changes made.
Click Apply to save changes. To undo a change (before clicking Apply) use the Reset Changes button.
The pencil buttons next to the Product Proximity and Process Zone are shortcuts to the Severity Classes tab under the Analysis Management window. Changes to the product proximity, process zones, and severity class combinations can be made in this screen.


