Difference between revisions of "Presage/User Guide/Document Management Screen"
From ISoft Wiki
< Presage | User Guide
Jump to navigationJump to search
| Line 7: | Line 7: | ||
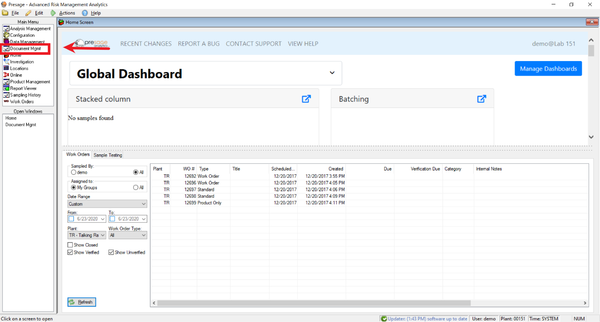
To navigate to the document management screen, click the '''Document Mgmt''' button on the main menu. | To navigate to the document management screen, click the '''Document Mgmt''' button on the main menu. | ||
[[Image:ISoft-Presage FindingDocumentManagement.png| | [[Image:ISoft-Presage FindingDocumentManagement.png|none|600px]] | ||
==Adding and Deleting documents== | ==Adding and Deleting documents== | ||
Revision as of 12:44, 18 June 2020
Main Summary
The main purpose of the Document Management screen is to allow Presage users to upload documents to their presage database and access those documents later.
This allows you to post instructions, user manuals, and anything else that you want your employees or fellow coworkers to see.
To navigate to the document management screen, click the Document Mgmt button on the main menu.
Adding and Deleting documents
To add a document: follow these steps:
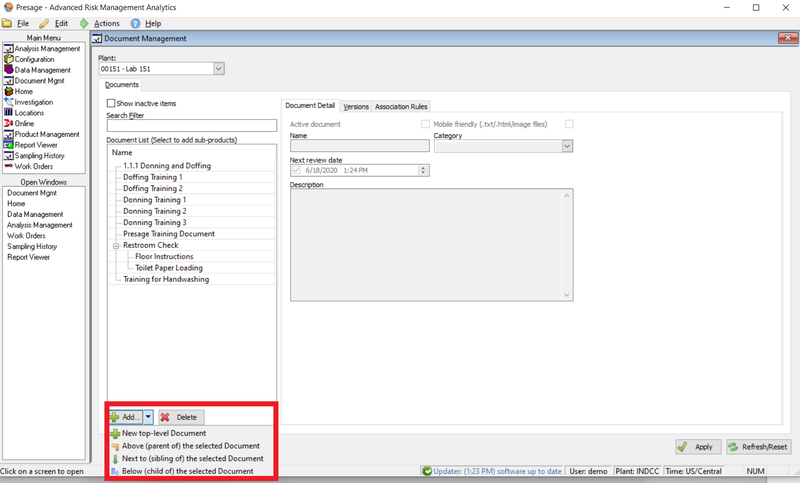
- In the 'Document Management' screen, make sure the proper plant is selected at the top left.
Click the 'Add' button on the bottom left. Select which level of the hierarchy your document belongs.
INSTRUCTIONS
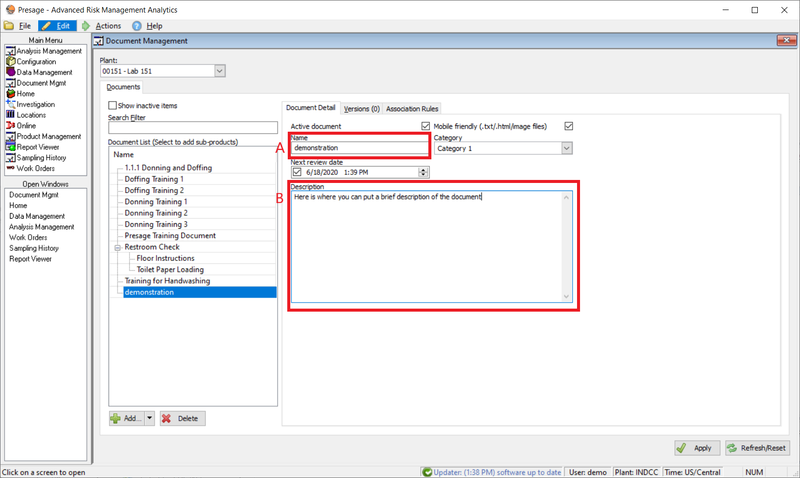
On the 'Document Detail' tab:
 name your document
 fill in a description
 assign a 'Next review date' if the document contains perishable information
 verify the document is 'Mobile friendly'
On the 'Versions' tab:
 click the 'Add' button and select your file from your computer or network
 click 'Approved' if the document is ready to display in work orders
 add any pertinent notes
On the 'Association Rules' tab:
 configure the plant, analysis, option, severity, and product on which you want this document to appear
 click the 'Apply' button at the bottom right to save your changes


