Difference between revisions of "QuickStart Adding a New Vendor"
From ISoft Wiki
Jump to navigationJump to search
Tonymerritt (talk | contribs) |
(Altered to use the Tip template) |
||
| Line 12: | Line 12: | ||
{{Tip|Entering the Zip Code will automatically fill out the city, state and country fields.}} | |||
| Line 18: | Line 18: | ||
{{Tip|If the Shipping Address is the same as the Billing Address clicking the '''Copy''' button will automatically copy the address fields.}} | |||
Revision as of 19:42, 14 June 2009
QuickStart Adding a New Vendor
To add a new vendor:
1.Click Vendor List in the Main Menu.
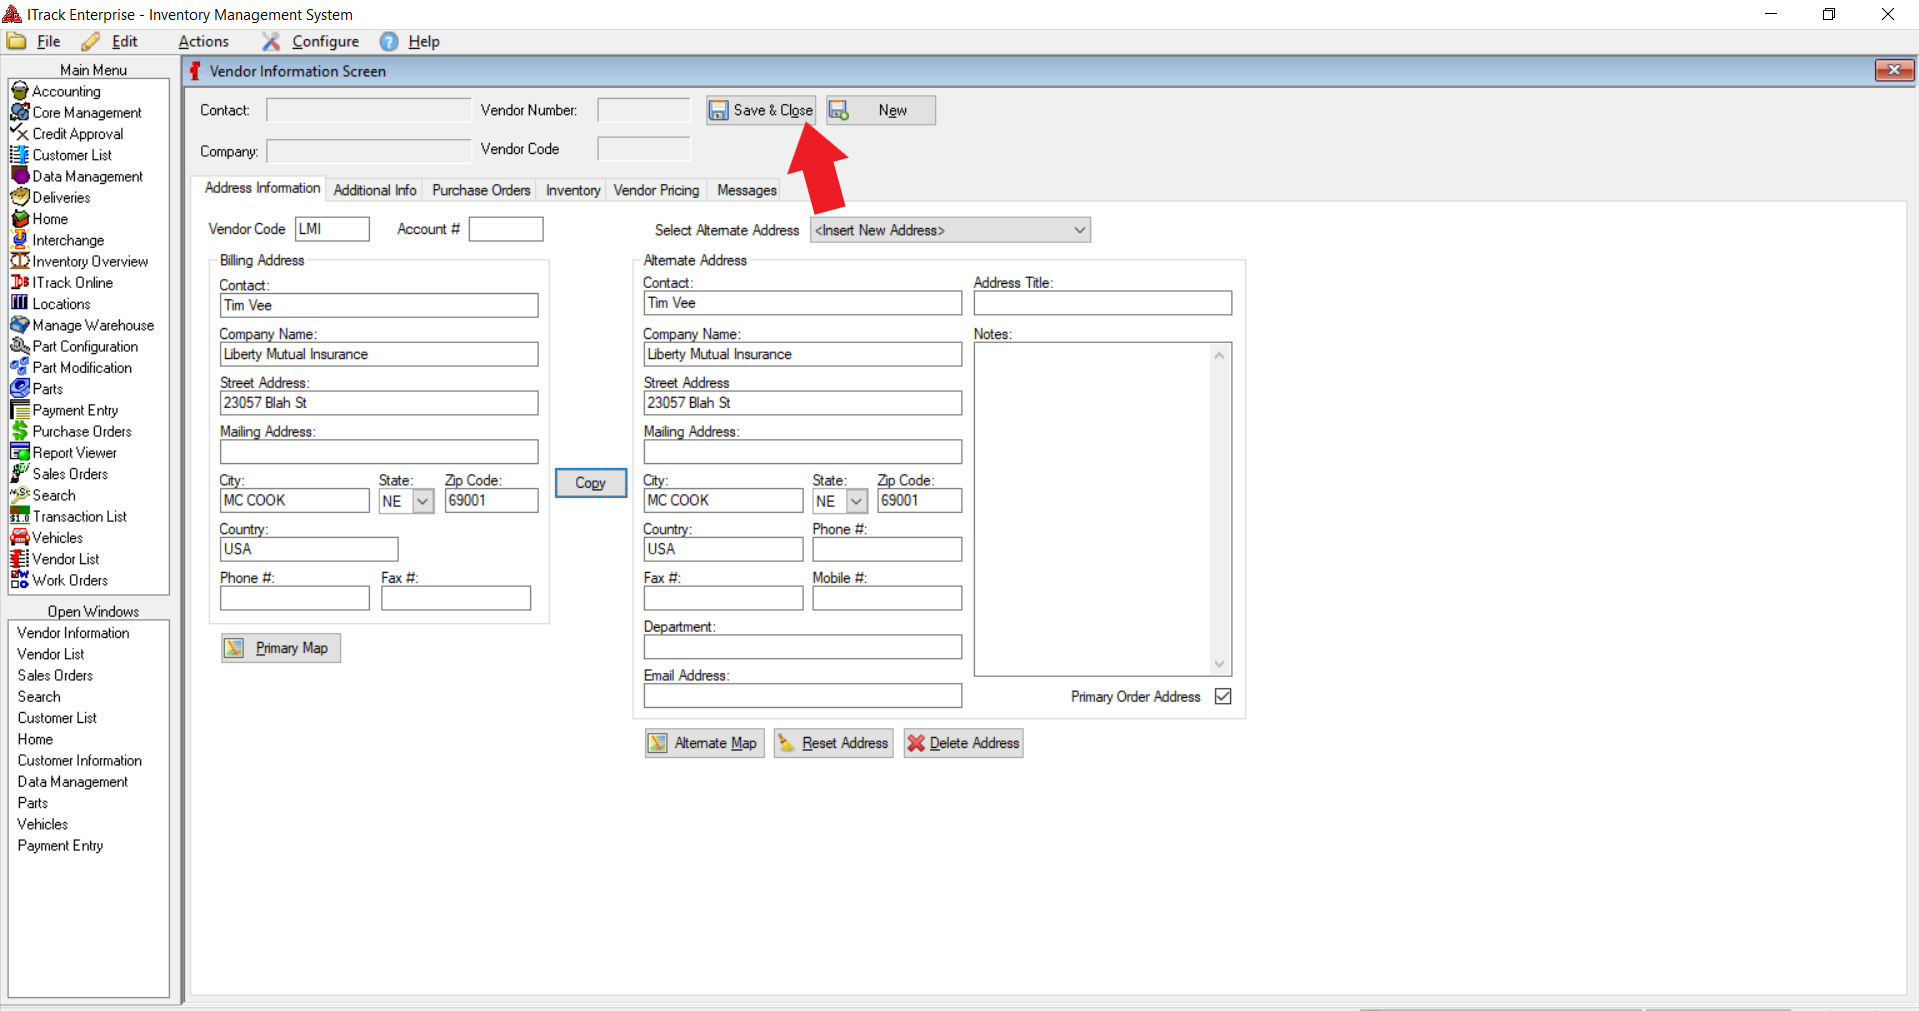
2.Click the Add button at the bottom of the page and the Vendor Information Screen will open.
3.Enter the necessary information into the appropriate fields.
4.When you are finished entering vendor information, click the Save & Close button.
| Tip |
| Entering the Zip Code will automatically fill out the city, state and country fields. |
| Tip |
| If the Shipping Address is the same as the Billing Address clicking the Copy button will automatically copy the address fields. |
