ITrack/Enterprise/Customer List Screen
Customer List Screen
This page will discuss the different features of the Customer List Screen. From this screen you will be able to monitor all of the information about your customers. From the Customer List Screen you will be able to add, edit, delete and sell to customers. To get to this screen from the Main Menu, click on Customer List.
Adding a Customer
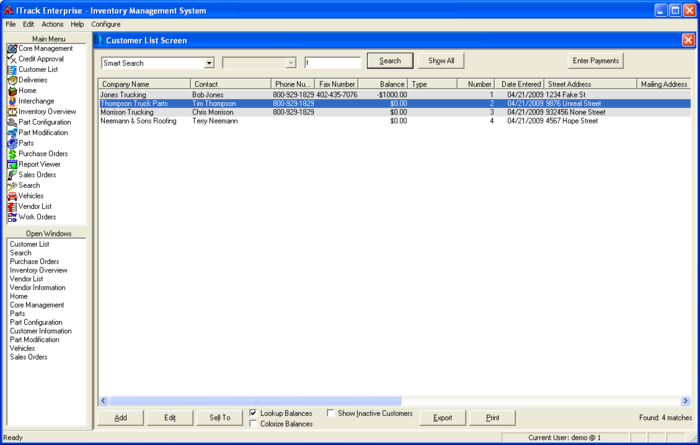
The opened Customer List Screen will appear as follows:
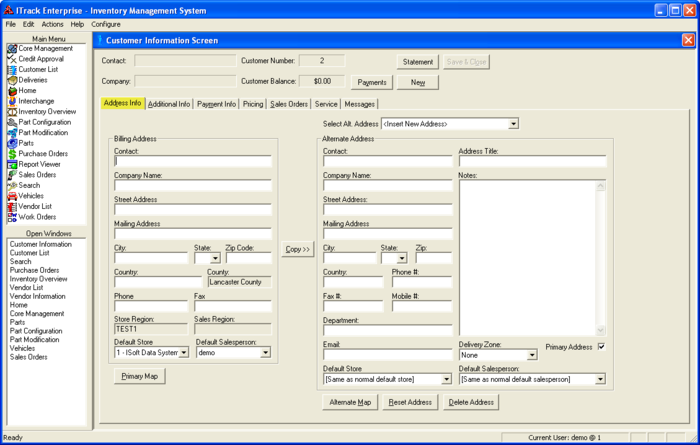
To add a customer, simply click the Add button in the lower left hand corner. This will bring you to the Customer Information Screen. You will start in the Address Info tab.
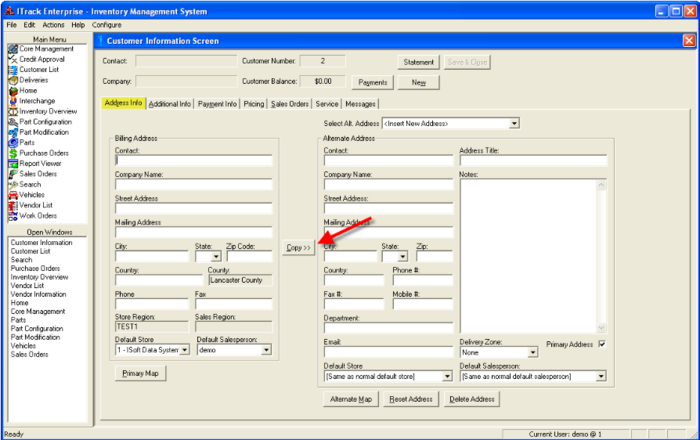
As you fill in the Contact and Company Name fields under Billing Address, they will appear in the gray fields above and in the correct corresponding fields under Shipping Address. Clicking on the Copy button in the center of the screen will transfer the rest of the information such as street address to the shipping address side of the screen.
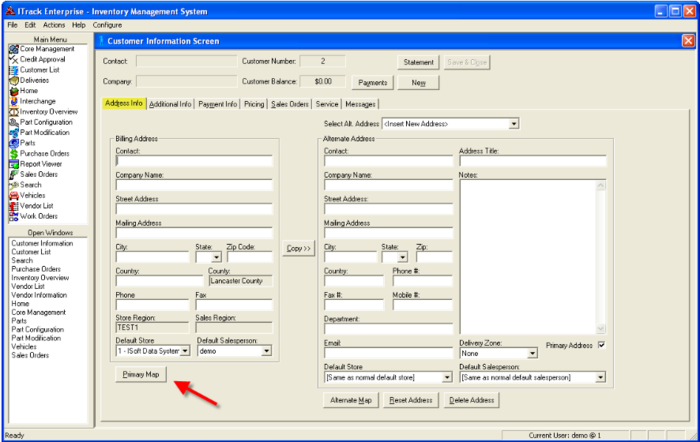
The Map button located below the Copy button will bring up Google® Maps and show a map and driving directions from your location to the customer's location. At this point you may choose use any of the other tabs on the screen such as Additional Info or Payment Info. Instructions for these tabs are located below.
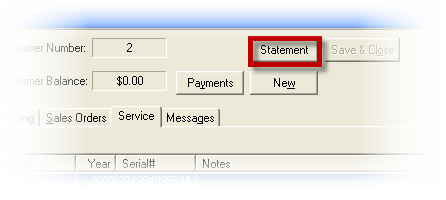
You may also print a statement by clicking on the Statement button, or apply payments for the customer by clicking on the Payments button. Or you may create a new customer by clicking on the New button in the upper right corner or close by clicking on the Save & Close button.
If you want to continue adding information about your customer, or want to check the history of this customer, the tabs following Address Info will be useful.
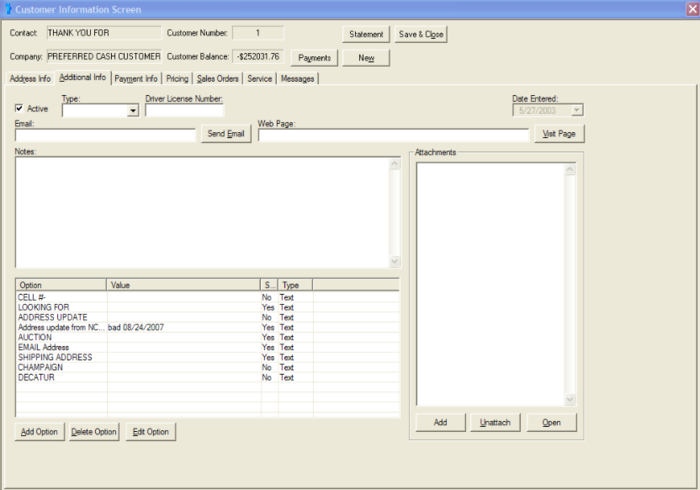
Click on the Additional Info tab located to the right of the Address Info tab. From this screen you can enter more information about the customer such as an email address, a web page address, and other important information.
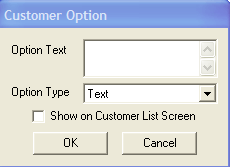
The Option and Value fields are particularly useful. You can enter in specific things you want to know about each customer. Click Add Option to add a new question. Click the Show on Customer List Screen box if you want your new question to show up on the Customer List Screen.
Then, in the Values field, answer the question you asked in the Option field. This Option will now appear on all customers' screens.
Now, if you go to the Customer List Screen, you can search by the new Option you entered.
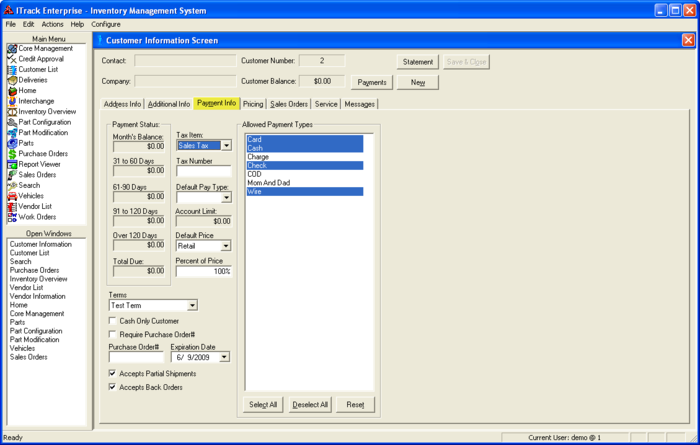
The next tab is the Payment Info tab. From here, you can see the payment status of the customer, choose payment methods you will accept from the customer and other payment information such as an account limit.
A - The Cash Only check box prevents the customer from charging.
B - The Tax Item field allows you to choose the default tax item to use when quoting or selling to this customer.
C - The Tax Number field will print the customer's tax number on invoices.
D - Default Pay Type allows you to select the default payment method used on the Sales Screen.
E - The Account Limit prevents a customer from charging more than the amount you set.
F&G - These fields allow you to adjust the price for a customer automatically. The default setting is 100% retail, but some customers might pay 100% wholesale or 120% cost or 95% retail (5% discount).
H - Use Allowed Payment Types to select the payment methods you allow for a customer.
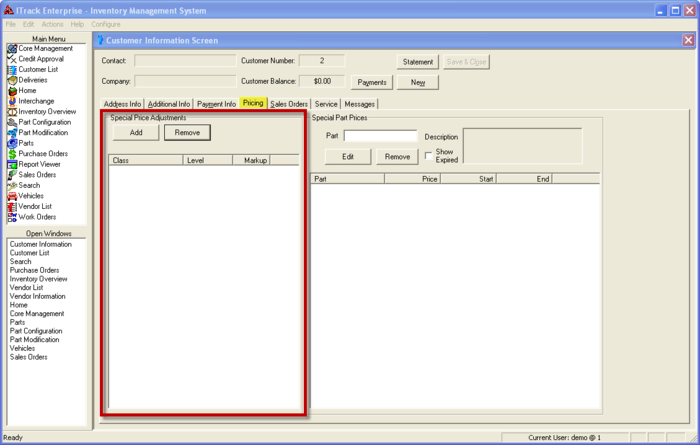
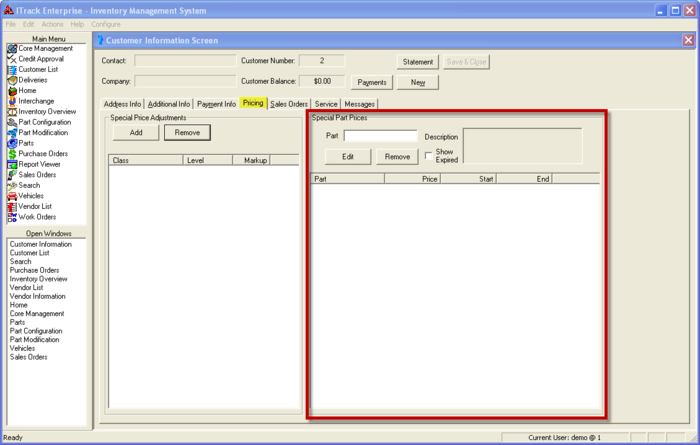
The next tab in the Customer Information screen, is the Pricing tab. It is divided into two main sections: the Special Price Adjustments pane and the Special Part Prices pane. With this tab you can special pricing that will apply to the individual customer overall, or for a particular part that is sold to the particular customer.
To adjust the special price applied to the customer overall, use their Special Price Adjustment pane, seen below.
Click the Add button. An item for special pricing will appear in the list block below. It will allow you to select the item and adjust the Class, Level, and Markup percentage with dropdown menus within the item. (The Class, Level, and Markup are determined by the users administrator and populated using the Administrator's Configure tools.)
To adjust the special price applied to parts for a customer, use the Special Part Prices pane. This pane works a little differently than the previous.
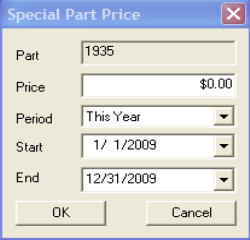
First, enter the part number that the adjustment is to be made to in the Part field. Then click the Edit button. The Special Part Price box will then open.
In this box you can enter the price, the period and the end and start dates for the range that the special pricing will apply. Then click The OK button. An item for special pricing will appear in the list block below.
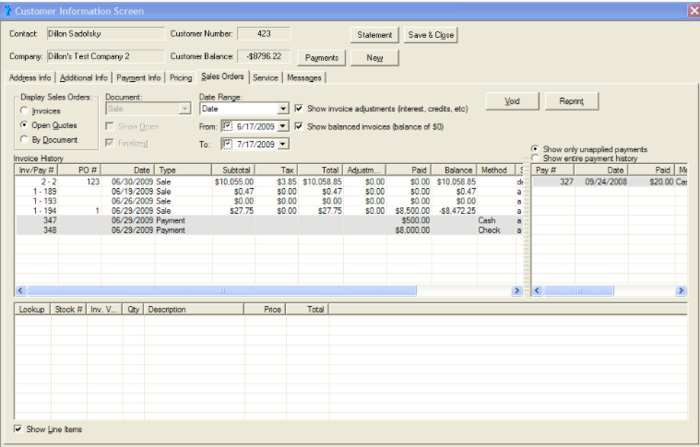
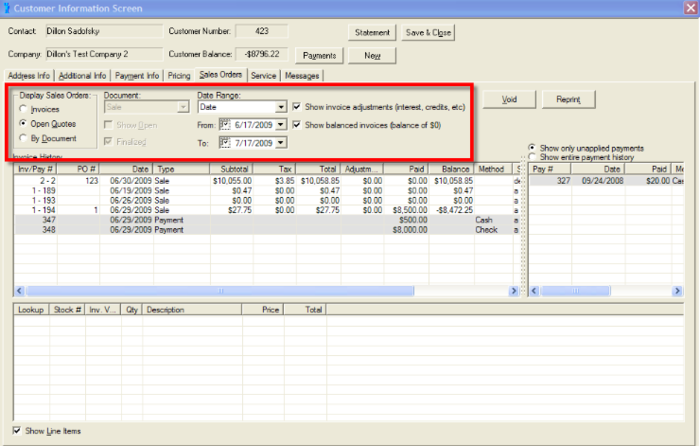
The next tab is the Sales Order tab. This tab shows the invoice history for the customer and line items.
The controls in the panel above the Invoice history allow you to select a variety of ways that you choose to view invoice items. Under Display Sales Orders, there are three radial buttons: Invoices, Open Quotes, and By Document. By selecting Invoices, or Open Quotes you will be able to see those documents for the customer that are current in the system. By selection the By Document button, you will be able to adjust the display criteria that is applied to the documents viewed by using the controls directly to the right of the Display Sales Order buttons.
The Document drop down menu allows you to adjust more specifically what type of document you would like to view, i.e., Counter Sales, Internet Sales, etc. The Show Open and Closed check boxes underneath the Document drop down menu, will filter for the state that the document is in at the time of viewing. (The list in the document menu is determined by the business at the time of configuration of the system.)
The Date Range drop down menu lets you determine what type of date range you would like to view, i.e., Date Closed, Date Entered, etc. The From and To fields below it determine the date range itself.
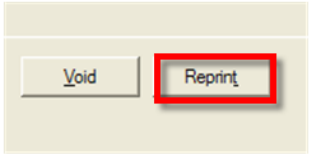
The Reprint button will reprint items you have selected.
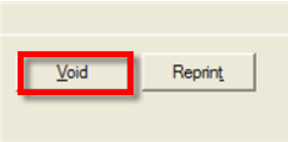
The Void button will void a payment or invoice, hiding it forever.
| Tip |
| Double clicking on an invoice or payment will re-open it. |
| Tip |
| Double clicking on a line item will open it in the inventory (parts) screen. |
Searching for a Customer
Return to the Customer List Screen. You may get to this screen by clicking on it from the Open Windows section on the left side of the screen, or, if you have closed the Customer List Screen, you can open it from the Main Menu.
At the top of the screen is a drop down list which will show the default search, Smart Search. By clicking on the down arrow in the list, you will see other search options such as Phone Number, Type and City. The customer database can be searched using any of these criteria, so it isn't a problem if you don't remember the name of the company, so long as you remember something about the customer.
The Smart Search is particularly useful as it searches for matching company or name or partial phone number or customer number all at once.
The next field allows you to specify what you want the search to find in regards to the type of search you selected.
After deciding on your search criteria, enter in keywords into the blank field located right of the middle of the screen. In our example below, we searched for a contact containing the letter "t". Then hit the enter key on your keyboard or click the Search button on your screen. This will bring up all of the customers that fit your search request.
If you want to see your entire customer database, simply click on the Show All button located to the right of the Search button. If you are viewing multiple customers, you can sort them by a variety of ways. By clicking on a certain field near the top of the screen, you can sort the customers by that particular type. All fields will sort alphabetically. For example, if you click the Company Name field, companies that start with “A” would appear towards the top. By clicking Company Name again, the results will sort in reverse alphabetical order so the companies that start with “A” would appear towards the bottom.
You can choose the order of your columns so that the most important information is easily viewable. Simply click and drag and column to have it place where you want it. ITrack will remember your column order.
At the bottom of the screen you will notice two check boxes: Lookup Balances and Colorize Balances.
If Lookup Balances is checked, your search results will include customers' account balances in the Balance column. If it is unchecked, no balances will appear. If the Colorize Balances box is checked, customers will appear as colors that correspond to account information.
- Black: Customer has no balance.
- Blue: You owe the customer (customer has a credit).
- Red: The customer owes you money and is over their credit limit.
- Yellow: The customer owes you money but is under their credit limit.
If the Colorize Balances box is unchecked, all customers will appear black.
Unchecking both of these boxes will result in slightly faster search lookups.
By highlighting a customer, you can then choose to Edit or Sell To a customer by selecting the corresponding button located at the bottom of the screen.
Clicking on the Sell To button will bring up the Sales Screen. See Sales Screen for information regarding sales.
The Print button allows you to print your current customer lookup (list). A variety of formats are available, but the default is a report sorted by name, account number, and balance.
