ITrack/Pro/Adding Custom Interchange Information
From ISoft Wiki
Jump to navigationJump to search
ITrack allows you to add and remove custom interchange information into it.
Add custom Interchange info
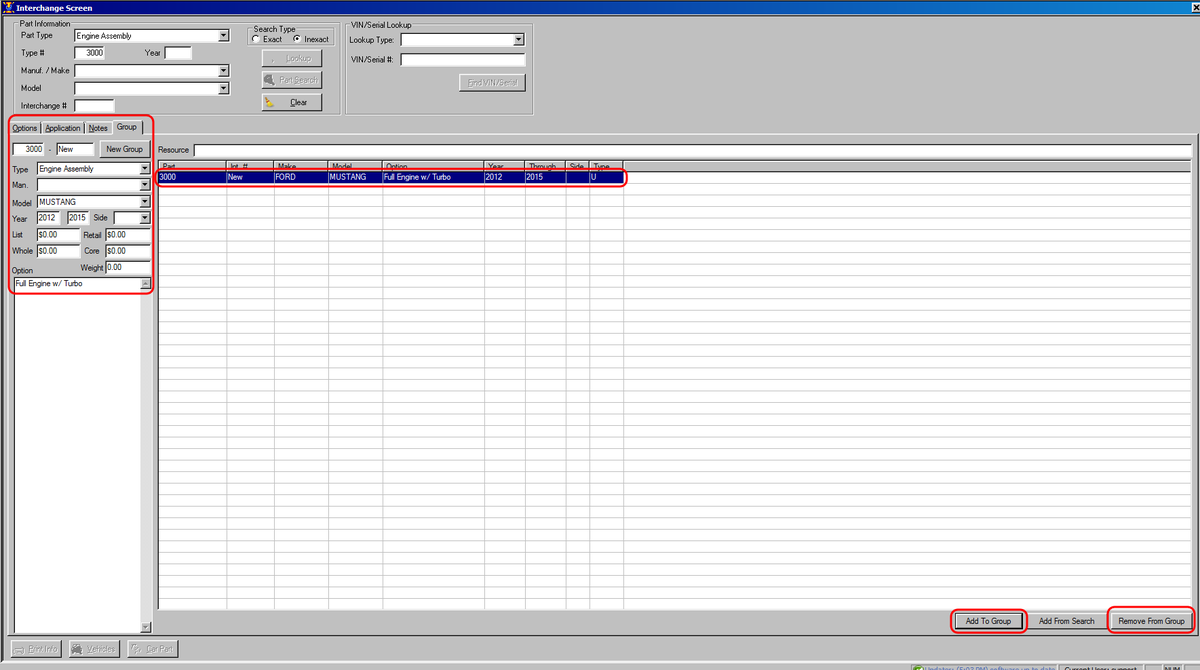
- Open the Interchange Screen and go to the Group tab.
- Fill in the required fields for:
- Part Type
- Interchange Number
- Vehicle Make/Part Manufacturer
- Vehicle Model/Part Model
- First Year
- Last Year
- Side
- Pricing fields (optional)
- Interchange Option (like manual windows vs electric windows)
- After all of the necessary fields have been filled out, click on the 'Add to Group' button. You should now see your information entered as a row in the results area.
Remove custom Interchange Info
- In the Group tab, bring up the part type and interchange number. This should show the interchange group in the results area.
- Select the row you want to delete.
- Click on the 'Remove from Group' button.
