ITrack/Enterprise/Vehicle Management Screen
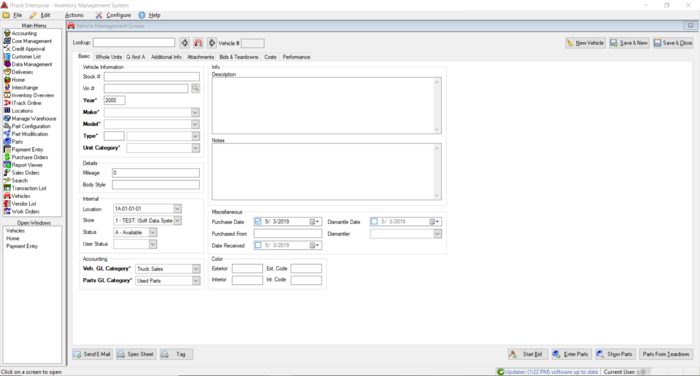
The vehicle management screen in ITrack Enterprise allows the user to enter and manage their vehicle list. Vehicle records both represent 'whole unit' vehicle inventory records as well as 'parent' records for other used inventory records. Vehicles can have images, attachments, Q&A, bids, teardowns, and much more.
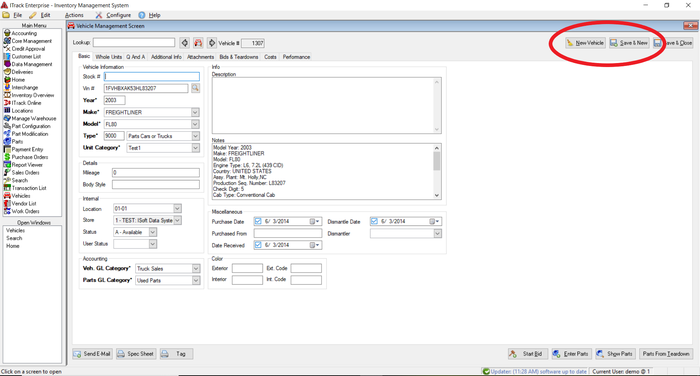
Clicking on Vehicles in the Main Menu will bring up the Vehicle Management Screen.
| Tip |
| ITrack includes numerous fields to track many aspects of your inventory and your business. Not all fields are required. Fill out the information you deem necessary and save at any time. If you are missing required information, ITrack will notify you with a pop up box. |
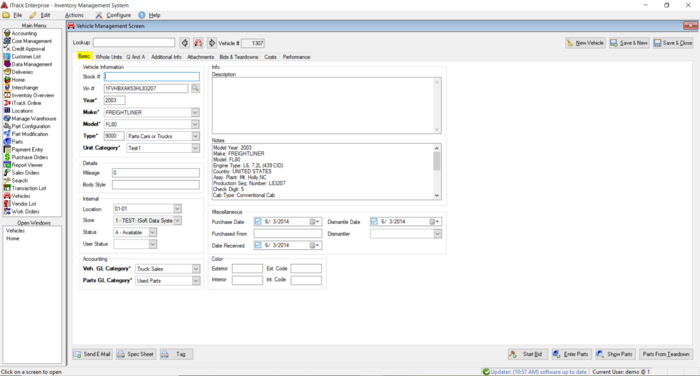
Basic Tab
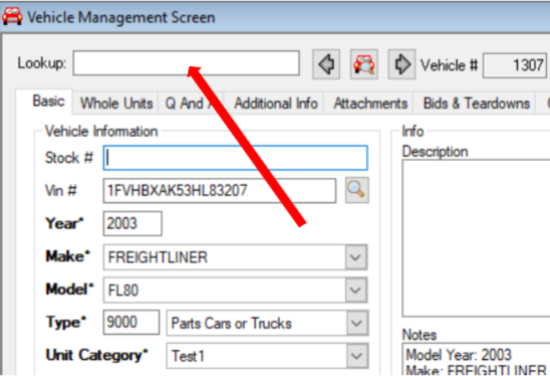
As you can see, the screen opens on the Basic tab. To create a vehicle, enter the VIN number for the vehicle. ITrack will automatically fill out several of the fields for you based on VIN information.
| Tip |
| At the top of the screen is a field called Tracking #. You may assign your own tracking numbers to vehicles if you wish. For example, you may want the tracking number to contain information on the vehicle such as type. Please note that tracking numbers can include alphabetical characters. If you don't want to enter a custom tracking number, ITrack will automatically assign a sequential number for you. |
Attachments Tab
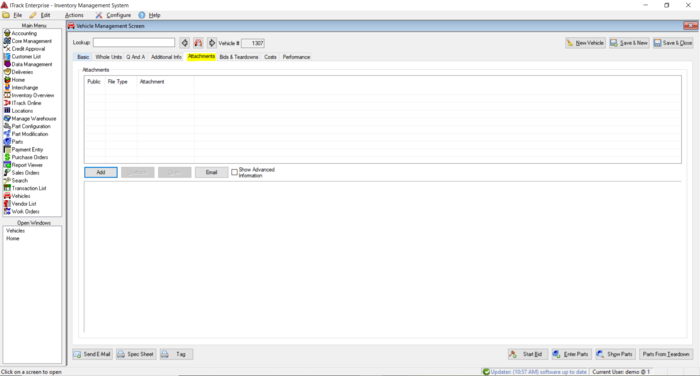
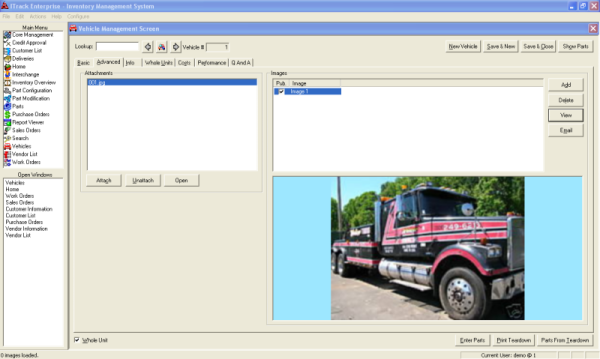
The Attachments tab allows you to enter images and attachments that will be associated with the vehicle. You may enter an unlimited number of images and attachments for each vehicle. Click the Add button below the Attachments window to access a particular file. Then select the file you want to add.
| Tip |
| You can select an image or attachment to preview images by double clicking on the file name, or by using the Open and View buttons. |
If you have entered images and/or attachments, you will be able to see a preview of the file. Now you can either add more files or delete files. If you have entered multiple files, click on the file you want to view and then click the View button to see a preview. Once the vehicle has been saved, you can click the Email button to send a picture of the vehicle to potential customers.
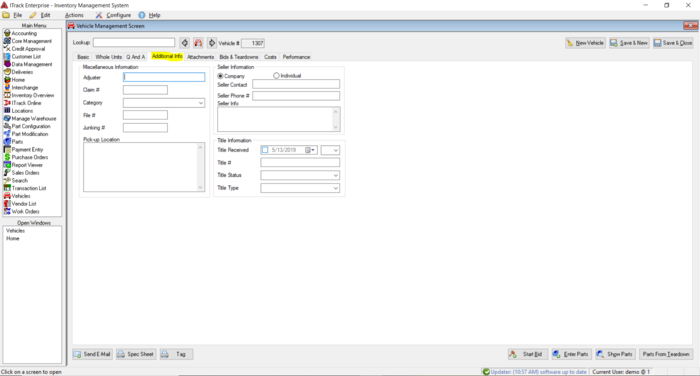
Additional Info Tab
The next tab is the Additional Info tab. This tab will allow you enter more information on the vehicle such as seller information, miscellaneous information, and title information.
| Tip |
| If you only want to enter basic information, you only need to visit the Basic and Whole Units tabs. After filling out the required information, just click Save & New or Save & Close, both located in the upper right. Or, if you want to enter parts from the vehicle, click the Parts From Teardown button in the lower right corner. |
The completed Info tab will have information about who you bought the vehicle from, title status on the vehicle, and other information about where you got the vehicle.
Whole Units Tab
On this tab, the user can configure information about the vehicle as an inventory record. The information on this tab will factor into the choices that are available on several other tabs on the screen. In addition, data on this tab affects any documents the vehicle gets added to (such as purchasing the vehicle on a purchase order or selling it on a sales order).
Picking the whole unit's 'Type' is the first important piece of information, as it defines the type of vehicle this is. Common whole unit types to use are 'Vehicle for Sale' or 'Parts unit'. After this has been chosen, the category options and flex fields can be filled out.
Also, the user can configure whether the vehicle should be shown on their website using the "Unit is public" check box.
As soon as a vehicle with a whole unit record has been saved, it can be received on a Purchase Order, added to invoices or quotes on the Sales Orders screen, or have work performed on the Work Orders screen just like a normal inventory record.
Bids and Teardowns Tab
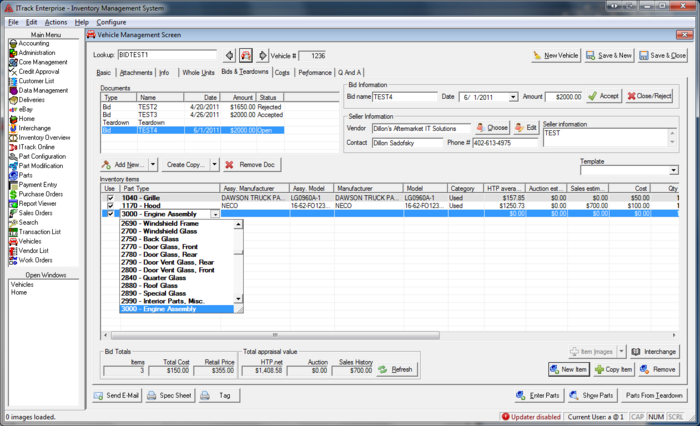
On this tab, the user can create and manage vehicle bids, appraise vehicle values, or enter used parts off the vehicle using a teardown.
Bids are named documents that represent a company's desire to purchase a vehicle. Starting a bid in ITrack is easy and allows the user to use ITrack's advanced appraisal features to help the user decide how much the vehicle is worth. In addition, keeping bids in ITrack allows the user to see the bid history on the vehicle (if the purchasing process goes on for awhile, this can help the vehicle purchaser remember the history) as well as quickly turn the bid worksheet into a vehicle teardown as soon as the vehicle has been purchased (see starting a vehicle with a bid for the steps).
| Tip |
| Its best to mark vehicles that are being bid on as status "B". This helps separate them from vehicles that are in stock and keeps them off of most searches. |
Creating Vehicle Bids
When adding a bid, the user may fill out the amount, date, contact info, as well as choosing a vendor who is selling the vehicle. This vendor field is not required, but if its filled out, it will save a step later when the accepted bid gets turned into a purchase order.
Use the Create new... button to start a new, open bid, or to begin a teardown. Use the Create Copy... button to create a bid that is a copy of a bid or a teardown, or to create a teardown that is a copy of a particular bid. Creating copies can save a lot of data entry if the user only wishes to make a minor modification on a subsequent bid (such as a different bid amount/date).
To fill out a bid, select it in the documents list. The user can now add parts to the bid worksheet. Each item can have important information filled out about it, such as part type, manufacturer, model, category, and pricing. As these values change, the item's appraisals will automatically be updated.
Individual parts can be added to or removed from the bid by clicking the New Item and Remove buttons, respectively. Items can be copied using the Copy Item button, saving data entry time. However, the most common operation is to add a whole template of common items to the bid. This an be done by picking an option in the Template dropdown right above the items list. Item templates are named lists of part types that can be quickly added to a bid. However, these are just suggestions. The user can pick and choose whichever items they want to enter off any number of templates.
| Tip |
| Whenever the user switches templates or bid documents, all items that are unchecked automatically get removed from the document. This helps to clear out the items that the user is not interested in. To keep items on a bid or teardown, check the Use column check, or simply fill out data about the item. |
The list of templates are tied to the whole unit type. This allows a company to have a different set of vehicle part templates on vehicles for sale vs parts units. Initially, this list should contain a single entry for each teardown list that existed in the system previously. However, these templates can be added or managed using the manage breakdown templates dialog. These bid/teardown templates are simply breakdown templates for whole unit part types.
As the user gains information about the vehicle, they can enter more parts into the worksheet of the bid, including projected pricing. The totals at the bottom of the screen show the user's projected totals for all items on this vehicle, including appraised values. If a bid is accepted, click the Accept button. A menu will pop up to see what operations the user would like to perform.
| Tip |
| Its best to come back and mark bids as rejected or closed when the company (or the seller) are not interested in the sale anymore, this way, other users will know the bid is no longer on the table. If the vehicle is no longer of interest, mark its status as D to delete it. |
Creating a Vehicle Teardown
Working with teardowns are very similar to bids, except that the teardowns don't need to be accepted. They are always open. If new items are added to the teardown, they will be created in inventory at the next save. Teardowns share most of their fields with bids, except for some additional fields that bid items don't have (such as part type specific flex fields or OEM #).
| Tip |
| Clicking the Parts From Teardown button simply brings the user to this tab and selects the current teardown (or creates a new one if one isn't found) |
The easiest way to create a teardown is by copying an existing bid into a new teardown. If no previous bid exists, the teardown will need to be created from scratch. In this case, the user should utilize the part templates to quickly enter a list of parts for that vehicle.
As the user fills out data, the pricing levels will automatically populate from the model pricing data (see part configuration for more information about part models and their default pricing). If a particular year/make/model or year/manufacturer/model combination is found in the interchange table, the interchange option dropdown will be populated with all available interchange options for that part type. Selecting one of these options will fill out the interchange # automatically.
If the user switches the side of an item to "Both", they will be asked if they want to copy the item into 2 versions of the item (a left version and a right version).
The Item Images button allows the user to add new images to parts as they add them to the teardown. Selecting an item and hitting the Add Images option will pop up a image selection dialog. Selecting an item and hitting the Remove Images option will clear out any new images that have been added to the item since the last save.
| Tip |
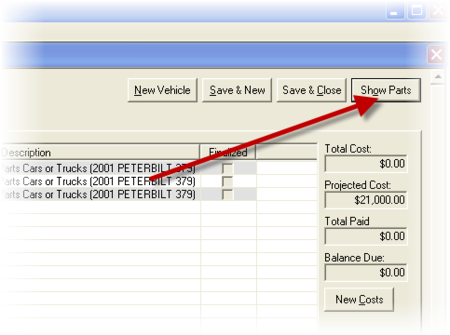
| To view images (or other data) added to a saved item, double click that item to view it on the parts screen. Or, the user can use the Show Parts button to show all vehicle parts on the search screen. Part images can be viewed from here as well. |
As soon as the user hits the save button, any new teardown items will be created in inventory with the quantity on hand (and other data) that was entered in the list.
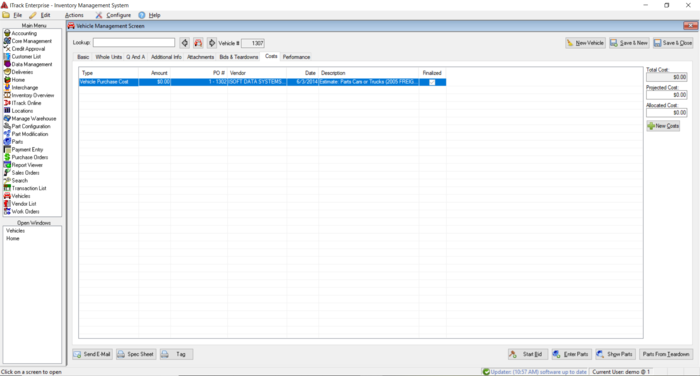
Costs Tab
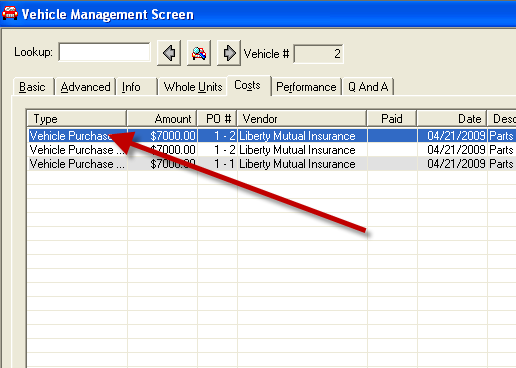
Next is the Costs tab. From here, you can enter and track all of the costs associated with a vehicle.
First, click on the New Costs button located on the right side of the screen. This will bring up the Purchase Orders screen. From the Purchase Order screen costs can be added to a vehicle. (See the Purchase Order screen section to find more information on filling out a Purchase Order).
You can Edit or Delete, the existing costs by double clicking on the cost and editing it in the Purchase Order screen.
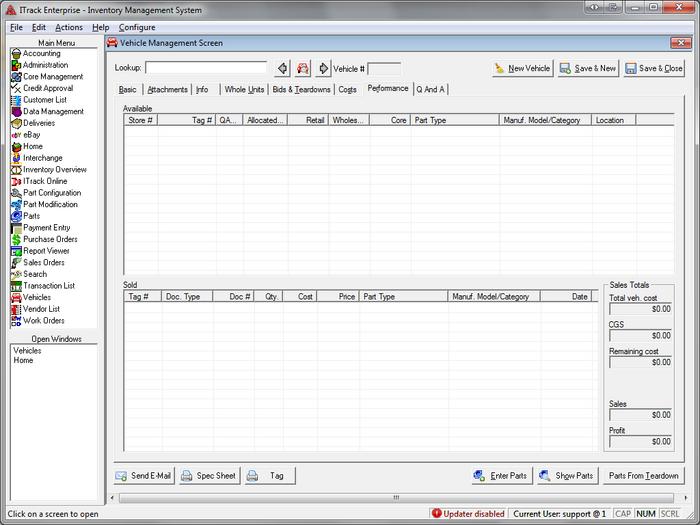
Performance Tab
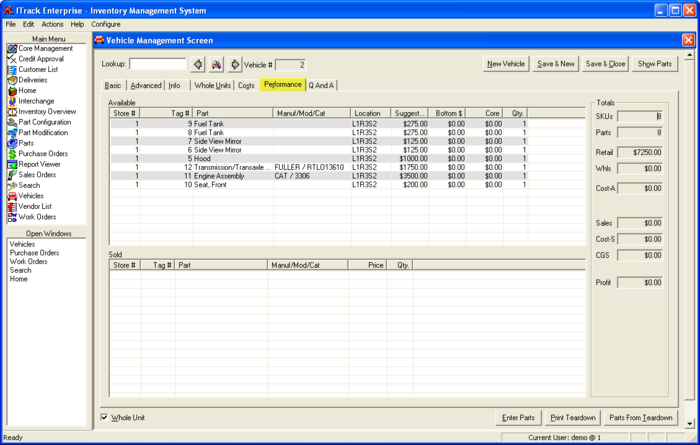
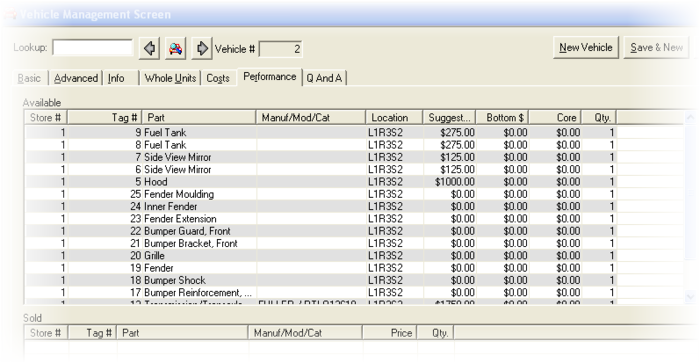
The Performance tab will start out blank when you enter in a new vehicle. Information about parts will show up once you enter parts for the vehicle. The first section shows available parts you still have in stock for the vehicle. The next section shows which parts you have sold from the vehicle.
On the right side of the screen is the Totals section. It shows valuable information including how many parts you have sold from this vehicle and the total dollar amount you have sold from the vehicle.
Q And A Tab
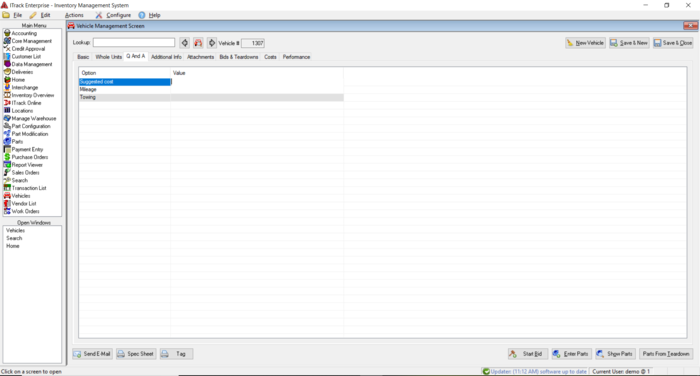
The final tab on the Vehicle Management Screen is the Q And A tab. This tab allows you to answer questions you want asked about your vehicles. To set questions for vehicles, go to Edit → Parts List and then click on the Teardown Sheets tab. Please reference your administration section of the manual for further information regarding setting up questions for vehicles.
Once you have saved questions, they will show up in the Q And A tab and you can answer them. You many want to ask questions regarding the cleanliness of the vehicle, how it runs, or the oil pressure. You can also set specific questions to certain makes and models of vehicles.
Now that we have finished entering information about the vehicle, we need to enter parts. If you want to enter parts for this vehicle now, click the Parts From Teardown button located in the bottom right of the screen. If you want to save the vehicle and enter parts for it later, click either the Save & New button (if you want to enter more vehicles) or the Save & Close button (if you are finished entering vehicles).
Common Vehicle Operations
Viewing and Editing Vehicles
There are times when you may want to view a vehicle you have entered in the past or make edits to information you have entered about a vehicle. This section will help you find a vehicle you have entered.
There are three ways to get to a vehicle you have already entered. The first is to click on Search from the Main Menu. Conduct a search for the vehicle you are looking for. Double click on the vehicle you want and it will open in the Vehicle Management Screen.
| Tip |
| See Searching for a Vehicle for more information about how to search. |
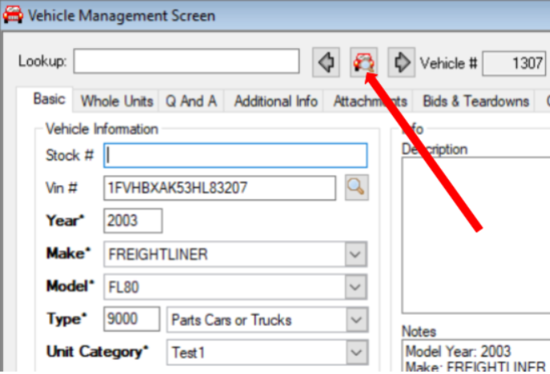
A second way to get to a vehicle is from the Vehicle screen. Enter the tracking number for the vehicle in the Lookup field and then click the search button (a car with a magnifying glass) to find the vehicle.
A third way to view an entered vehicle is click on the arrows on either side of the lookup button to look through your saved vehicles numerically.
Once you have found the vehicle, you can view/edit it on any of the tabs.
When you are finished editing the vehicle, be sure to click the Save & New button or the Save & Close button so your changes are saved.
Tips for Creating New Vehicles
When creating a new vehicle record, the user must only fill out the required fields (year, make, model, whole unit type, whole unit category), but some optional information can be very useful later. For example, vehicle images (see the attachments tab) both help identify the vehicle on the search screen, but add a lot of information to the user's website if they display vehicle records.
Receiving a Vehicle on a Purchase Order
When first saving a new vehicle, the system will ask the user if they want to create a PO to receive the vehicle into inventory. A purchase order like this is the preferred way to receive a vehicle into stock. In addition, any purchase costs added to the PO will automatically show up on the costs tab as vehicle purchase costs. If you choose not to do this when first saving, it can be done later by simply going to the PO screen and typing in the vehicle's stock #, or by going to the vehicle's costs tab and hitting add new cost.
Starting a Vehicle with a Bid
Many vehicles are negotiated over for some time before a purchasing decision is made. ITrack can track this information as well as vehicle inventory. If the user wishes to enter a vehicle that is being bid on, follow these steps:
- Start a new vehicle
- Fill out important vehicle information like normal, including year, make, model, and whole unit information. Picking a whole unit type (such as parts unit) before moving on will make future steps easier.
- Switch the vehicle status to B (vehicle bid). This will automatically take the user to the bids and teardowns tab, create a new bid, and select it.
- Fill out the bid as detailed in the bids and teardowns tab. The list of items will be appraised automatically using auction data, internet sale information, and local sales history data.
- Save.
Later, the bid may be rejected, or the user may make another bid to the vendor. In this case, go to the bid tab, select the bid in question and hit the "Close/Reject" button. This will deactivate the bid. If you wish to create another bid, you can quickly create a copy of the rejected bid by selecting it and clicking "Create Copy..." and picking "Create copy bid". This will copy over all your work into a new bid.
If a particular bid is accepted, select that bid and hit "Accept". This will pop up a dialog prompting the user to choose what operations they would like to perform. Common choices at this point are switching the vehicle status to A (making it show up in normal searches) and creating a PO to receive the vehicle into inventory. Also, if the vehicle components are available for selling, choosing the option "Copy this bid to a new teardown" allows the user to create a teardown with all the same items on it as the accepted bid to avoid re-entering data.
Entering New Parts
If you are adding parts from a teardown, please read on. If you are not adding parts from a teardown, skip to the section on the Parts Screen.
Parts From Teardown
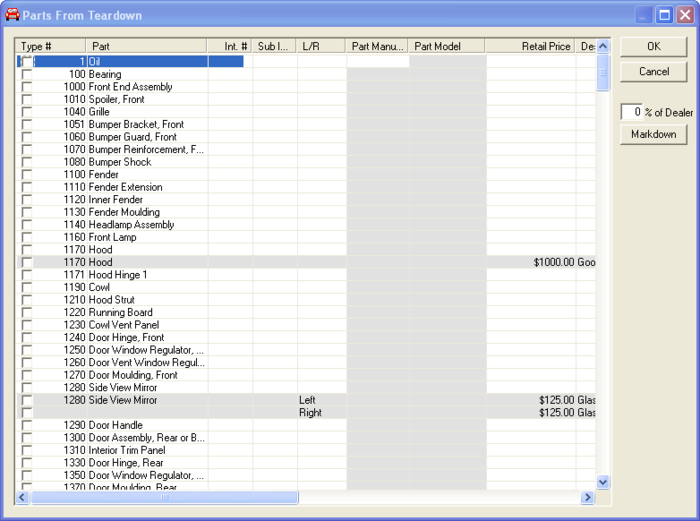
Click OK and the Parts From Teardown screen will appear. Now, you can go through the list and click the box next to the parts you want to enter. In the L/R column, you can select if you have the left, right or both sides of a certain part, for example, front doors.
Use the scroll bar at the bottom to show more fields. Some of the other fields include pricing options such as retail, wholesale, and core pricing. You may wish to fill out a variety of fields so you will have information saved about the parts such as descriptions and pricing.
When you are finished selecting the parts from teardown for the vehicle, click the OK button. to save the parts into your inventory. Now, when you go back to the vehicle and look at the Performance tab, you will see the parts you entered for the vehicle. When you first enter the parts, they will show as available. Once you sell parts, they will show in the Sold section right below the Available section.
You can also view the parts added by clicking on the Show Parts button.
