Difference between revisions of "ITrack/Enterprise/Work Orders Screen"
(Fixed more broken links) |
|||
| Line 5: | Line 5: | ||
Using the ''Work Orders'' screen allows you to associate different types of work with a particular vehicle or list of parts and track the use in the inventory you have in Itrack Enterprise. | Using the ''Work Orders'' screen allows you to associate different types of work with a particular vehicle or list of parts and track the use in the inventory you have in Itrack Enterprise. | ||
To access the ''Work Orders'' screen, click on ''Work Orders'' in the [[main menu]] in the upper left of the screen, it is last in the list. | To access the ''Work Orders'' screen, click on ''Work Orders'' in the [[ITrack/Enterprise/Home Screen|main menu]] in the upper left of the screen, it is last in the list. | ||
To begin a work order, start by selecting the type of work that is to be done in the ''Type'' field in the upper left hand corner or of the ''Work Orders'' screen. Some examples of work types would be Rebuilds, Service, or Repair. (The list is configurable to your needs upon original set up of the Enterprise system.) Once the type is selected, you will need to select a customer, ''Category'' and ''Job'' type. If you do not assign a Unit #, the system will automatically assign the next number in line to the Work Order. You can continue to fill in as much information as possible in the fields along the top of the ''Work Orders'' screen. | To begin a work order, start by selecting the type of work that is to be done in the ''Type'' field in the upper left hand corner or of the ''Work Orders'' screen. Some examples of work types would be Rebuilds, Service, or Repair. (The list is configurable to your needs upon original set up of the Enterprise system.) Once the type is selected, you will need to select a customer, ''Category'' and ''Job'' type. If you do not assign a Unit #, the system will automatically assign the next number in line to the Work Order. You can continue to fill in as much information as possible in the fields along the top of the ''Work Orders'' screen. | ||
To add parts to the work order, click on the '''Add Part''' button at the bottom right of the ''Work Orders'' screen. You will be redirected to the [[Search screen]]. Search for the part as you would on a sales order. When you have found the part that you want to add to the work order, you can double click on it. You will be returned to the ''Work Orders'' screen and the part will appear on the order. | To add parts to the work order, click on the '''Add Part''' button at the bottom right of the ''Work Orders'' screen. You will be redirected to the [[ITrack/Enterprise/Search Screen|Search screen]]. Search for the part as you would on a sales order. When you have found the part that you want to add to the work order, you can double click on it. You will be returned to the ''Work Orders'' screen and the part will appear on the order. | ||
[[Image:16.2 Work Order Show Job.png|thumb|center|700px]] | [[Image:16.2 Work Order Show Job.png|thumb|center|700px]] | ||
| Line 25: | Line 25: | ||
[[Image:16.4 Work Order Labor.png|thumb|center|700px]] | [[Image:16.4 Work Order Labor.png|thumb|center|700px]] | ||
Now that the work order has been filled out, you can save it by clicking on the '''Save''' button in the lower right hand corner of the ''Work Orders'' screen. The work order will remain “open” until the '''Finalize''' box is checked in the lower right hand corner of the screen. Once the work order is saved, it will appear under the ''Work Orders'' tab on the [[Home screen]]. | Now that the work order has been filled out, you can save it by clicking on the '''Save''' button in the lower right hand corner of the ''Work Orders'' screen. The work order will remain “open” until the '''Finalize''' box is checked in the lower right hand corner of the screen. Once the work order is saved, it will appear under the ''Work Orders'' tab on the [[ITrack/Enterprise/Home Screen|Home screen]]. | ||
[[Image:16.5 Work Order Home.png|thumb|center|700px]] | [[Image:16.5 Work Order Home.png|thumb|center|700px]] | ||
[[Category:ITrack/Enterprise]] | [[Category:ITrack/Enterprise]] | ||
Latest revision as of 20:29, 2 September 2009
Creating Work Orders
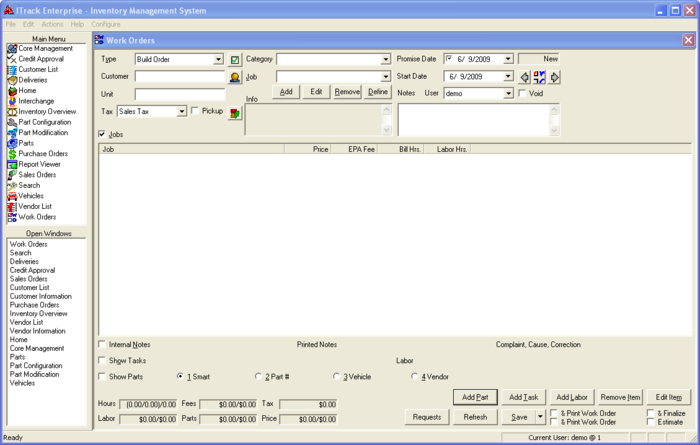
Using the Work Orders screen allows you to associate different types of work with a particular vehicle or list of parts and track the use in the inventory you have in Itrack Enterprise.
To access the Work Orders screen, click on Work Orders in the main menu in the upper left of the screen, it is last in the list.
To begin a work order, start by selecting the type of work that is to be done in the Type field in the upper left hand corner or of the Work Orders screen. Some examples of work types would be Rebuilds, Service, or Repair. (The list is configurable to your needs upon original set up of the Enterprise system.) Once the type is selected, you will need to select a customer, Category and Job type. If you do not assign a Unit #, the system will automatically assign the next number in line to the Work Order. You can continue to fill in as much information as possible in the fields along the top of the Work Orders screen.
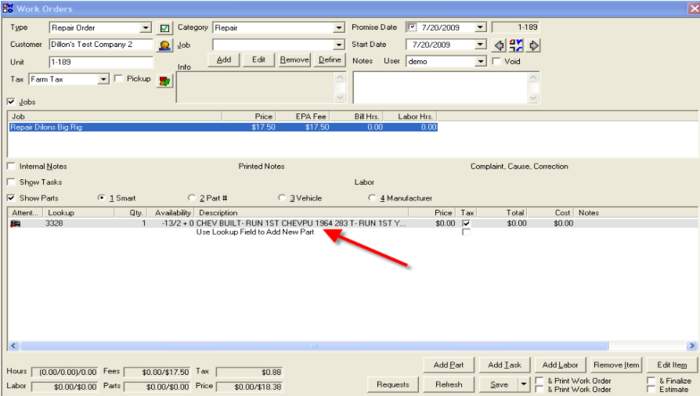
To add parts to the work order, click on the Add Part button at the bottom right of the Work Orders screen. You will be redirected to the Search screen. Search for the part as you would on a sales order. When you have found the part that you want to add to the work order, you can double click on it. You will be returned to the Work Orders screen and the part will appear on the order.
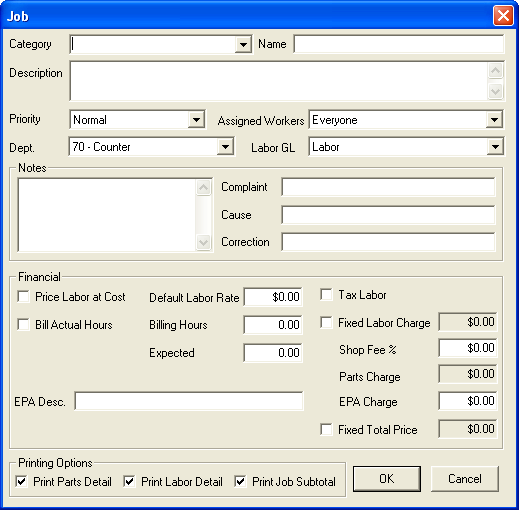
To add a job to the work order, click on the Add button, under the Job field. A new window will open where you can add information about the job. Click the OK button when you are finished entering information and the job will be saved to the work order.
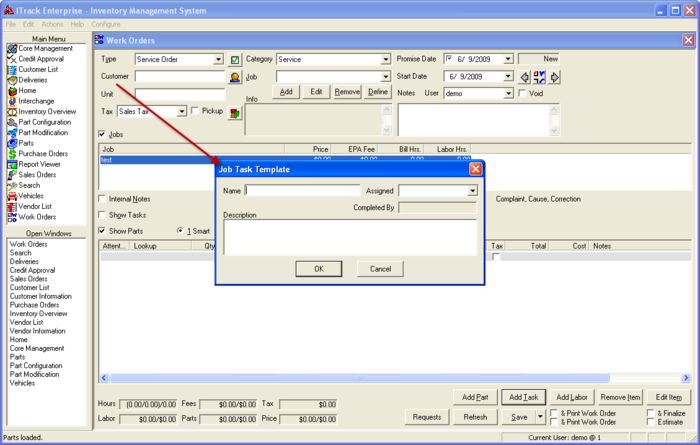
You can also enter specific tasks associated with the Job, or the work order in general. You can do this by clicking on the Add Task button. A window will open that will allow you to add information for that task, including who the task is assigned to.
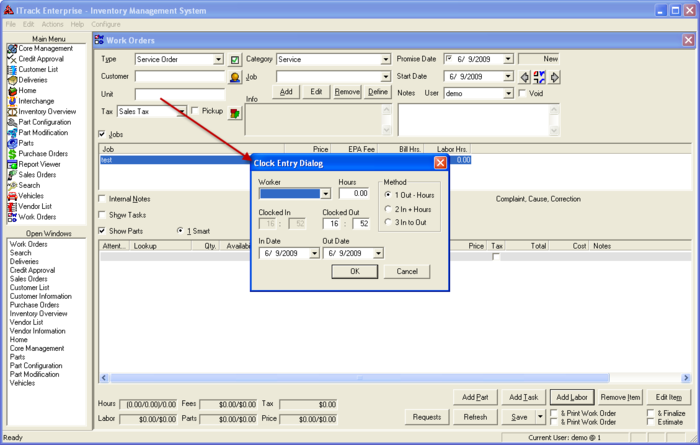
Just as you added tasks, you can add labor cost to the work order, by clicking on the Add Labor button. A window will open that will allow you, or the person that the order is assigned to, to add time to the order for the work that has been done. This can be done as many times as it is necessary to complete the work.
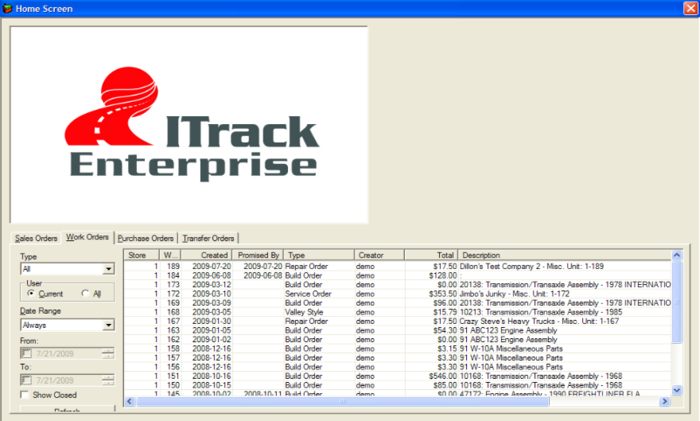
Now that the work order has been filled out, you can save it by clicking on the Save button in the lower right hand corner of the Work Orders screen. The work order will remain “open” until the Finalize box is checked in the lower right hand corner of the screen. Once the work order is saved, it will appear under the Work Orders tab on the Home screen.
