ITrack/ODBC
From ISoft Wiki
< ITrack
Jump to navigationJump to search
Overview
The MySQL ODBC Driver is required to print from ITrack.
Installation
32 bit Windows
To install:
- Download MySQL ODBC Driver 3.51
- Run the installer (leave defaults)
- After the install is finished, go to Start > Control Panel > Administrative Tools > Data Sources (ODBC) > System DSN (tab)
- Click Add...
- Scroll to the bottom of the list, select MySQL ODBC 3.51 Driver, select Finish
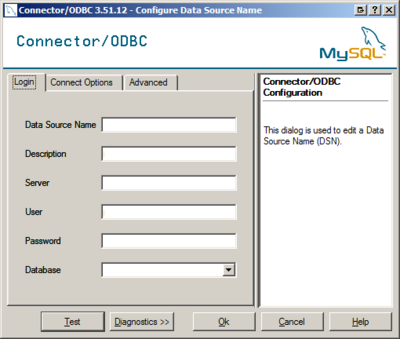
- Enter in the following Information in the box that appears:
- Data Source Name: This must match the name of the database that ITrack is connecting to. Normally, this is either "itrackpro" or "itrackenterprise"
- Description: ITrack
- Server: Enter the same server as ITrack uses (Open ITrack > Edit menu > Options > General (tab) > Server IP Address)
- Fill in the User and Password fields, then click Test. "Success; connection was made!" will display if the connection is working properly.
- Go to the Advanced tab
- Make sure the Don't Optimize Column Width and Return Matching Rows boxes are checked, but no others.
- Click Ok and OK again to save your changes.
64 bit Windows
Because the version of ODBC that is needed for ITrack to work is an older version of the ODBC driver (still 3.51), using the 32 bit version of the data sources program in Windows is required. By default, Windows puts the 64 bit version of the Data Sources (ODBC) in Administrative Tools, and it won't work. For more information, check this Microsoft KB article.
To Install:
- Navigate to %systemdrive%\Windows\SysWoW64 and look for Odbcad32.exe
- See the section "32 bit Windows" above to complete the ODBC setup
- It is recommenced that a shortcut be placed in Administrative Tools and named "Data Sources (ODBC) 32" and the existing one be renamed to "Data Sources (ODBC) 64" for future ease.
